[ad_1]
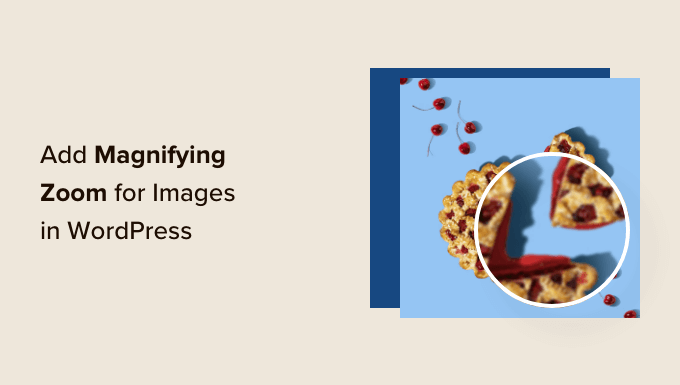
Do you want to add an Amazon-like magnifying zoom for images in WordPress?
Adding a zoom feature will allow users to see details that they would not see in a normal-sized image.
In this article, we’ll show you how to easily add magnifying zoom for images in WordPress.

Why Add a Magnifying Zoom for Images?
Adding a magnifying zoom feature on your WordPress website will allow visitors to view the intricate details of the images clearly.
If you have a photography website, then adding a magnifying feature will allow users to zoom in on your photographs to view the finer details.
Similarly, if you run an online store, then your customers will be able to zoom in on product images.
Many big eCommerce websites already use magnifying zoom for product images. It allows customers to examine the product and creates a better shopping experience in your store.
That being said, let’s see how you can easily add a magnifying zoom for images in WordPress.
How to Add a Magnifying Zoom For Images in WordPress
First, you need to install and activate the WP Image Zoom plugin. For more details, please see our step-by-step guide on how to install a WordPress plugin.
Upon activation, you need to head over to the WP Image Zoom » Zoom Settings page from the WordPress admin sidebar.
Next, you need to configure the zoom effect settings by switching to the ‘Zoom Settings’ tab and choose a lens shape that you want to use.
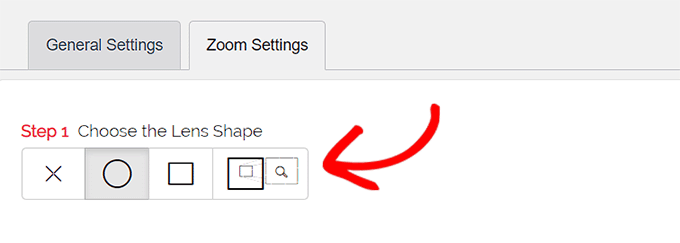
You can choose from circle, square, and zoom window lens shapes. You can even choose a ‘No Lens’ (⨯) option if you don’t want to use a shape for magnifying effect.
After choosing your preferred lens, you need to scroll down to the next step where you can preview an image with the selected lens to see how it works. The plugin has a preview image that you can use to test your changes.

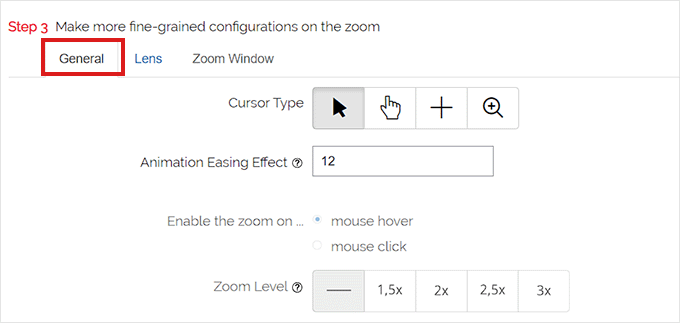
Next, you need to switch to the ‘General’ tab.
From here, you can select a cursor type, set an animation effect, enable the zoom on mouse hover or mouse click, and define a zoom level.
If you want even more options, some of the features are only available for the pro version of the WP Image Zoom plugin.
After making your choices accordingly, simply go to the ‘Lens’ tab from the top.
You can now configure settings like lens size, lens color, lens border options, and more if you selected the ‘circle’ or ‘square’ lens in Step 1.

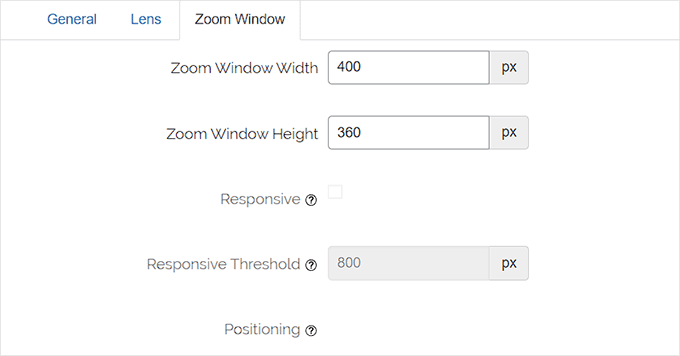
If you selected the Zoom Window Lens, then you need to switch to the ‘Zoom Window’ configuration tab.
From here, you can change the width and height of the zoom window, positioning, distance from the main image, border colors, and more.
Next, you need to simply click the ‘Save Changes’ to store your settings.
After that, all you have to do is configure a few general settings.
Configure General Plugin Settings
Next, you need to switch to the General Settings tab under the plugin settings.
From here, you can now enable features like zoom on WooCommerce product images, thumbnails, mobile devices, attachment pages, product category pages, and more.
All you need to do is simply check the boxes next to these options.

You can also remove the lightbox effect, so users can smoothly zoom images.
However, you would need the Pro version of the plugin for this feature.

If you are not going to remove the lightbox for images, then you need to scroll down to the ‘Enable inside a Lightbox’ option and check the box next to it.
Note: You can see supported lightboxes to make sure that the zoom works fine inside a lightbox on your site.
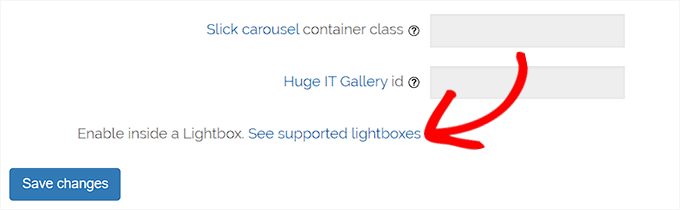
Once you are done adjusting the settings, don’t forget to click on the ‘Save Changes’ button to store your settings.
Magnifying zoom will now be enabled for WooCommerce products.
You can go visit your online store to check our zoom feature.

However, if you want to enable zoom for images on WordPress posts and pages, you need to follow the step below.
Step 3. Enable Magnifying Zoom for Images in Block Editor
By default, the magnifying zoom is not enabled for images on your posts and pages. You need to do it manually after adding an image to your content.
First, you need to open a post you want to edit in the block editor.
Next, you need to upload an image to that post from the media library or your computer.
Once you do that, simply click on the image to open up its’ Block Settings panel on the right corner of the screen.
From here, simply go to the ‘Styles’ tab and click on the ‘With Zoom’ button to apply magnifying zoom to your image.
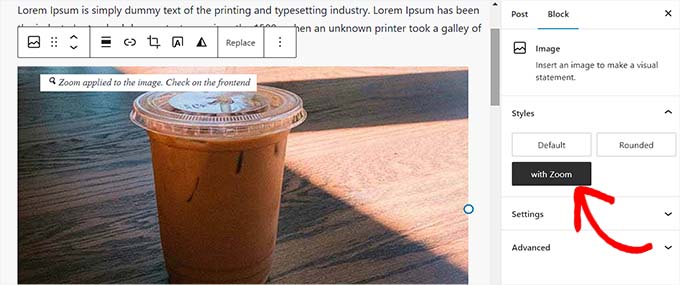
After that, simply click the ‘Update’ or ‘Publish’ button at the top to store your settings.
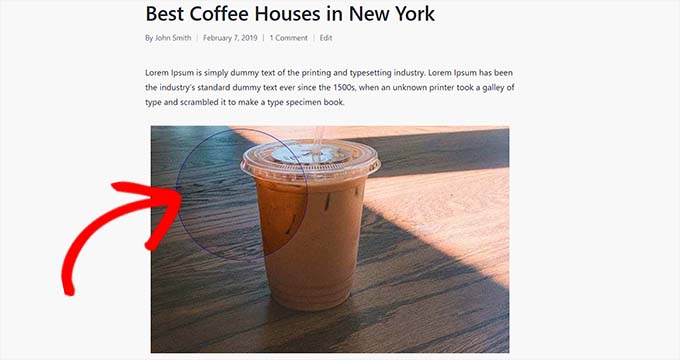
The zoom feature will look like this on your site:
Note: You will need to repeat this step each time you want to add the zoom effect to an individual image.
We recommend using high-quality images for the zoom feature to look great. High-quality images are normally larger in file size and take longer to load which will affect your website speed and performance.
To solve this issue, you need to optimize your images for the web before uploading them to WordPress.
We hope this article helped you learn how to add magnifying zoom for images in WordPress. You may also want to see our guide on how to optimize images for search engines and our top picks for the best image compression plugins.
If you liked this article, then please subscribe to our YouTube Channel for WordPress video tutorials. You can also find us on Twitter and Facebook.
The post How to Add Magnifying Zoom for Images in WordPress first appeared on WPBeginner.
[ad_2]
Source link