
[ad_1]
Are you looking to add product videos to your WooCommerce product galleries?
Videos can provide more detailed and engaging demonstrations of your products. Additionally, they can help make your WooCommerce store more visually appealing and engaging.
In this article, we will show you how to add WooCommerce product videos to your online store.

Why Add WooCommerce Product Videos to Your Store?
By adding product videos to your WooCommerce store, you can effectively showcase your products in a more detailed and informative way. This can provide your customers with a better understanding of your product’s features and benefits.
This can lead to increased conversion rates because visitors who watch product videos are 73% more likely to make a purchase.
Additionally, showing your products in action through video can help build trust and credibility with potential customers, making them feel more confident about their purchases.
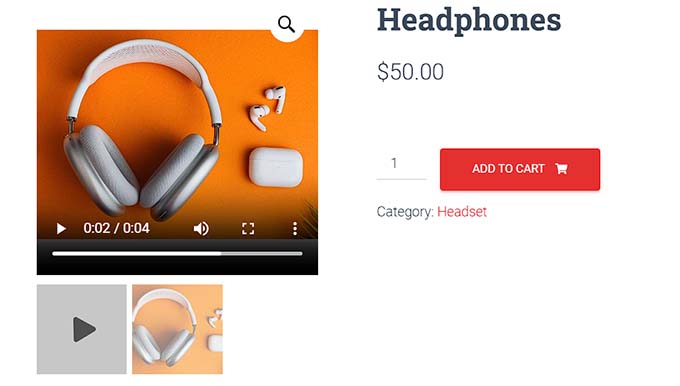
For instance, if you have an online store that sells headphones, then adding a video that demonstrates the sound quality and features of the headset can help you get more conversions.
Furthermore, adding product videos to your WooCommerce galleries can also help increase your website’s SEO rankings because search engines prioritize websites that have multimedia content, including videos. Higher visibility in the search results can lead to more people visiting your store and buying products.
That being said, let’s see how you can easily add product videos to your WooCommerce galleries. You can use the links below to jump to the method you want to use.
Method 1: Add WooCommerce Product Video Using YITH WooCommerce Featured Audio & Video Content (Free & Premium)
For this method, we will be showing you how to add product videos to WooCommerce galleries using a premium plugin. We recommend this method if you want more control over your video display and playback settings.
First, you need to install and activate the YITH WooCommerce Featured Audio & Video Content plugin. For more detailed instructions, please see our beginner’s guide on how to install a WordPress plugin.
With this plugin, you can add a video from YouTube, Vimeo, or your own video from the media library to the WooCommerce gallery.
Note: There is also a free YITH WooCommerce Featured Video plugin. However, it doesn’t allow you to configure most of the video, modal, and gallery settings.
Configure the Plugin’s General Settings
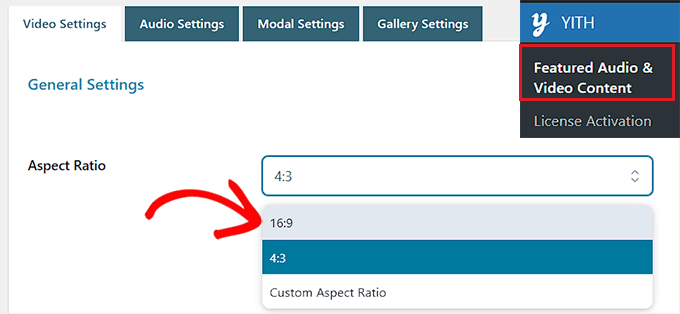
Upon activation, head over to the YITH » Featured Audio & Video Content page from the WordPress admin sidebar.
This will open up the ‘Video Settings’ page. From here, you can start by selecting an aspect ratio for the product video from the dropdown menu.
If you are using the free version, this will be the only setting that will be available to you.
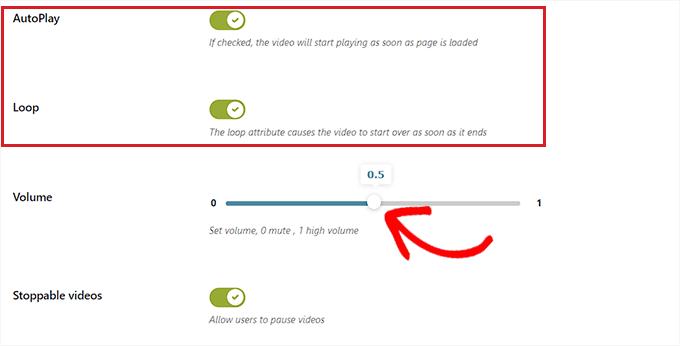
Next, toggle the ‘AutoPlay’ switch to active if you want the video to start playing as soon as the page loads.
You can also toggle the ‘Loop’ switch so that the video will start over as soon as it ends.
Once you have done that, you need to move the slider next to the ‘Volume’ option to adjust the volume of the video. Then, simply toggle on the ‘Stoppable videos’ switch to allow users to pause a video.
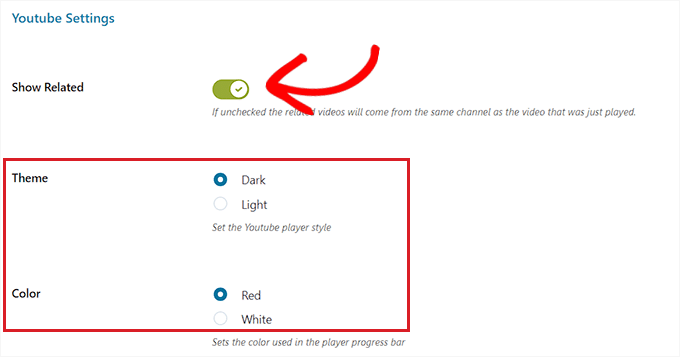
Next, scroll down to the ‘YouTube Settings’ section and toggle the ‘Show Related’ switch on if you want to recommend other YouTube videos from the same channel as your video. This setting is only necessary if you are embedding a product video from YouTube.
After that, you can choose a theme and style for the YouTube video player.
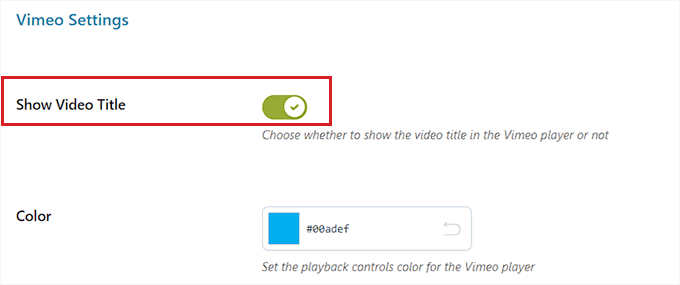
Once you have done that, you need to scroll down to the ‘Vimeo Settings’ section and toggle on the ‘Show Video Title’ switch to display the video title in the Vimeo player. You will only need to change this setting if your product videos are hosted on Vimeo.
Additionally, you can select a playback control color for the Vimeo player.
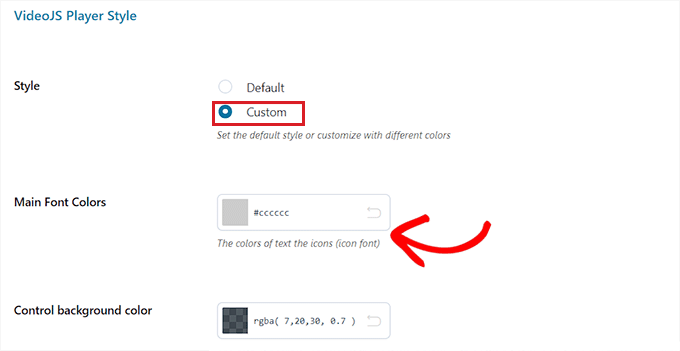
After that, move to the ‘VideoJS Player Style’ section and choose ‘Custom’ as the ‘Style’ option.
This will open up customization settings, where you can configure the background color, slider color, button color, and more of the video player.
Once you are done, click the ‘Save Options’ button to store your settings.
Configure Modal Settings (Premium Plugin Only)
Now, you need to switch to the ‘Modal Settings’ tab from the top of the page. Keep in mind that this tab won’t be available if you are using the free plugin.
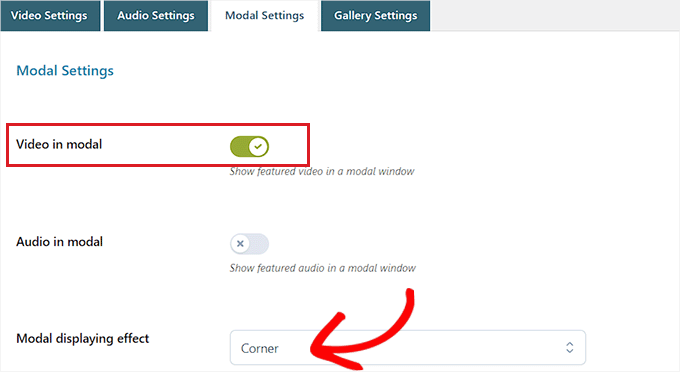
Once you are there, simply toggle the ‘Video in modal’ switch if you want to display the featured video in a modal window. This will show the video within a lightbox in front of the other content on the page.
After you have done that, you can also choose a ‘Modal displaying effect’ from the dropdown.
Next, click the ‘Save Options’ button to save your changes.
Configure Gallery Settings (Premium Plugin Only)
You now need to switch to the ‘Gallery Settings’ tab from the top. This tab is only available in the premium version.
From here, you have to select the ‘WooCommerce Gallery’ option as the ‘Video and Audio gallery mode’ to display the product videos in the WooCommerce gallery.
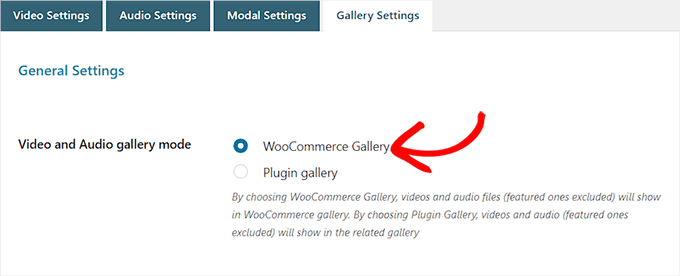
Alternatively, by selecting the ‘Plugin Gallery’ option, the featured video will be shown in a related gallery.
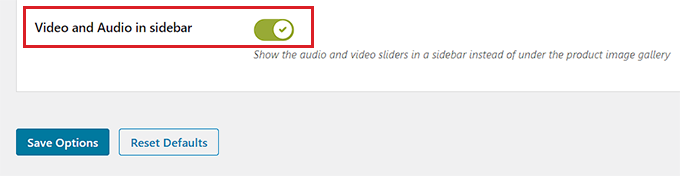
On the other hand, you can also toggle the ‘Video and Audio in sidebar’ switch if you want to display the product video in the sidebar instead of the WooCommerce or related gallery.
Once you are done, don’t forget to click the ‘Save Options’ button to store your settings.
Add the Product Video to the WooCommerce Gallery
It’s now time for you to add the WooCommerce product video to the WooCommerce gallery.
First, you need to visit the Products » All Products page from the WordPress admin sidebar. Once you are there, simply click the ‘Edit’ link under a product name to open up the ‘Edit Product’ page.

Next, scroll down to the ‘Product Data’ section and click on the ‘Video’ tab from the left column.
Now, you need to select how you want to add the video from the ‘Add Video’ dropdown menu. For this tutorial, we will be choosing the ‘By URL’ option because we will be adding a YouTube video URL.
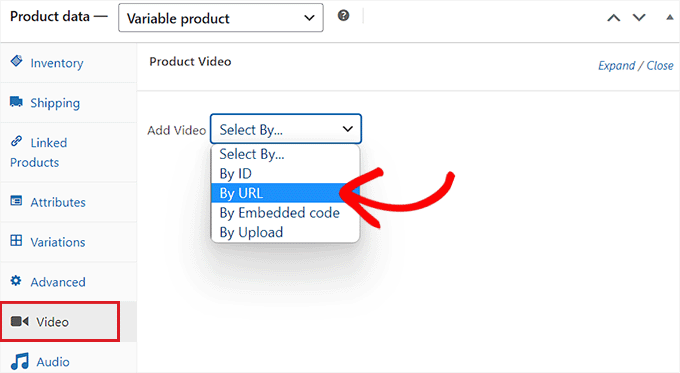
Alternatively, you can upload a video using the WordPress media library. However, we don’t recommend this method because uploading videos uses a lot of bandwidth.
For more details, you may want to see our beginner’s guide on why you should never upload a video to WordPress.
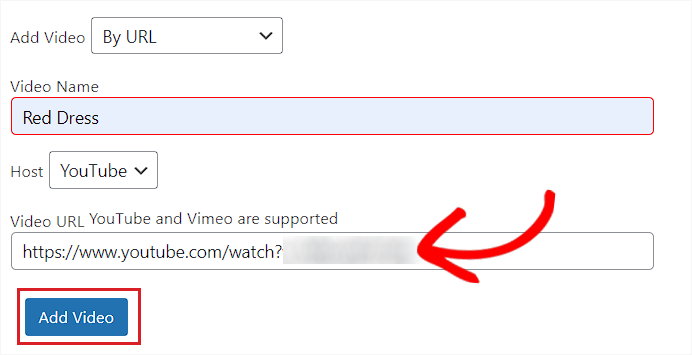
You will then be asked to type a name for the product video into the ‘Video Name’ box.
Once you have done that, simply paste the YouTube video URL into the ‘Video URL’ box and click the ‘Add Video’ button.
Finally, click on the ‘Update’ or ‘Publish’ button at the top to save your changes.
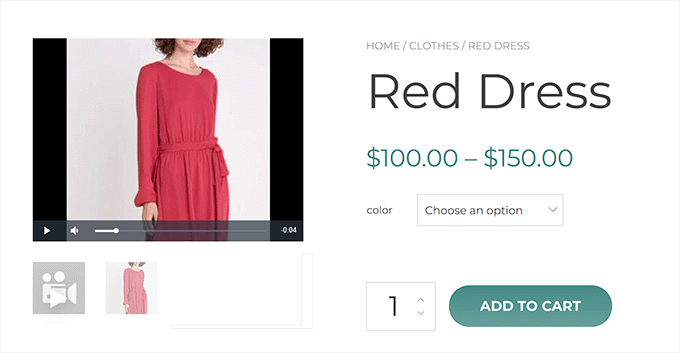
You can now visit your online store to check if the video has been added to the WooCommerce gallery of your product.
This is how the product video looked on our demo website.
Method 2: Add WooCommerce Product Videos Using Really Simple Featured Video (Free)
If you are looking for a free and simple way to add WooCommerce product videos, then this method is for you.
First, you need to install and activate the Really Simple Featured Video plugin. For more details, see our tutorial on how to install a WordPress plugin.
Configure the Plugin’s Settings
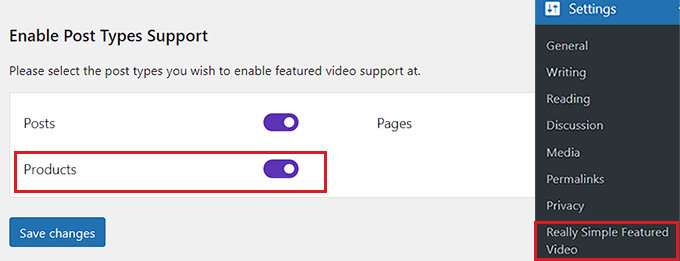
Upon activation, head over to the Settings » Really Simple Featured Video page from the WordPress admin sidebar.
From here, toggle the ‘Products’ switch to enable video support for WooCommerce. After that, simply click the ‘Save Changes’ button to store your settings.
Next, you need to switch to the ‘Controls’ tab from the top. Here you can configure settings for self-hosted and embedded videos.
Now, just move to the ‘Self-hosted videos’ section and start by toggling the ‘Controls’ switch to add controls to the video player.
After that, you can also toggle the ‘Loop’ switch to keep playing the video on a loop. Additionally, you can also mute the video by default by toggling the switch next to ‘Mute sound’.
Once you have done that, simply toggle on the ‘Autoplay’ switch if you want the video to start playing automatically.
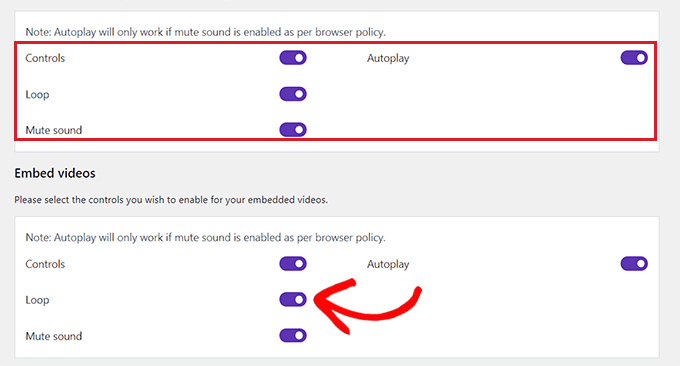
Next, scroll down to the ‘Embed videos’ section, where you will find all these options repeated for embedded video.
Simply configure these settings to your liking and click the ‘Save Changes’ button to store your settings.
Add the Product Video to the WooCommerce Gallery
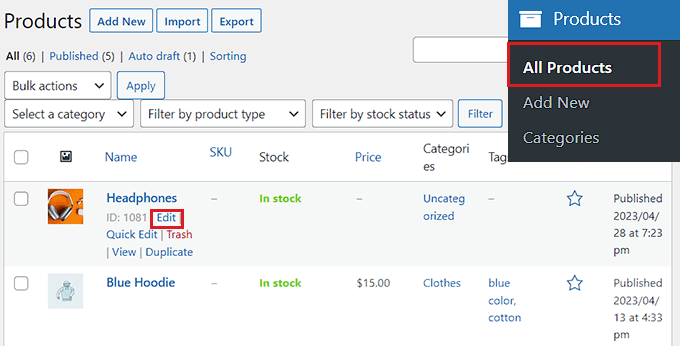
To add a product video to the WooCommerce gallery, head over to the Products » All Products page from the admin sidebar.
From here, go ahead and click the ‘Edit’ link under a product name to open it.
Once you are there, you need to scroll down to the ‘Featured Video’ section in the left column and select a video source.
If you want to upload a video from your computer or media library, then you need to select the ‘Self’ option. However, to embed a video from YouTube or some other platform, you will have to choose the ‘Embed’ option.
Note: We don’t recommend uploading videos on your website because they use a lot of bandwidth. For more details, you may want to read our guide on why you should never upload a video in WordPress.
For this tutorial, we will be choosing the ‘Embed’ option because we want to add a YouTube video.
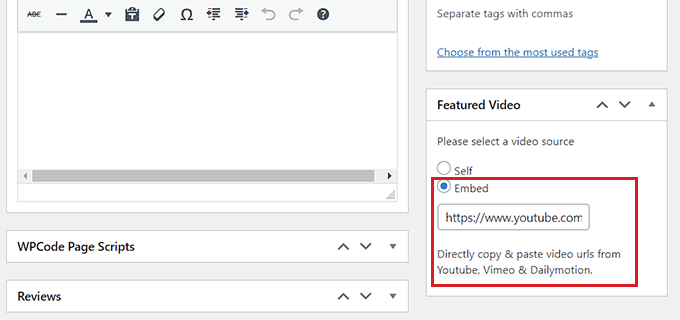
Upon selecting that option, a ‘Video URL goes here’ field will be displayed. Simply add the YouTube, Vimeo, or Dailymotion video link into the field.
Finally, click the ‘Update’ or ‘Publish’ button at the top to save your changes.
Now you can visit your website to check out the WooCommerce product video.
We hope this article helped you learn how to add WooCommerce product videos to your product galleries. You may also want to see our tutorial on how to schedule coupons in WooCommerce and our top picks for the best WooCommerce plugins to grow your site.
If you liked this article, then please subscribe to our YouTube Channel for WordPress video tutorials. You can also find us on Twitter and Facebook.
The post How to Add Product Videos to Your WooCommerce Galleries first appeared on WPBeginner.
[ad_2]
Source link