
[ad_1]
Do you want to enable your website visitors to upload files on your contact form?
Maybe you are hiring employees and want to collect resumes, or perhaps you are running a photography contest where you need the applicant to attach files.
In this article, we will show you how to easily create a file upload form in WordPress.

Why Create a File Upload Form in WordPress?
If you want to collect any kind of file from your users on your WordPress website, then a file upload form is a great idea.
You can let users upload images, PDF files, Word documents, or other types of files.
Using a file upload form makes life easy for you and your users. Instead of the email back-and-forth, you can create a form that includes all the fields you need, so you can collect all information at once.
Also, your form should automatically save the form data in your WordPress database. That way, you can easily find the submissions, even if you miss or delete an email.
That being said, let’s take a look at how to create a file upload form in WordPress.
How to Create a File Upload Form in WordPress
For this tutorial, we will be using WPForms, which is the best contact form plugin for WordPress.
First, you will need to install and activate the WPForms plugin. For more detailed instructions, check out our step-by-step guide on how to install a WordPress plugin.
Note: WPForms also offers a free version. However, you will need the Pro version of the plugin to unlock the file upload form template.
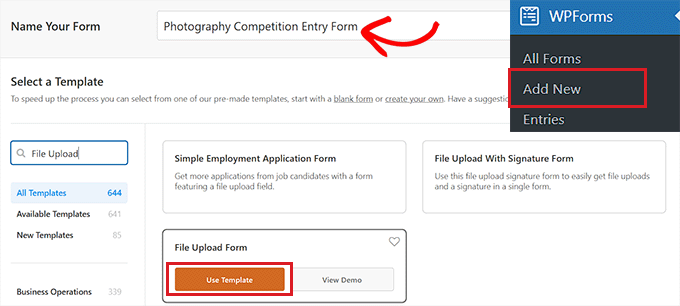
Upon activation, head to the WPForms » Add New page from the WordPress admin sidebar.
This will take you to the ‘Search Template’ page, where you can start by naming your form. You need to also look for the file upload form template in the search box on the left.
Next, simply click the ‘Use Template’ button under the ‘File Upload Form’ option.
You will now be taken to the WPForms builder, where the File Upload Form will be automatically created for you.
You can use the file upload form template without making any changes, or you can also drag and drop form fields from the ‘Add Fields’ sidebar.
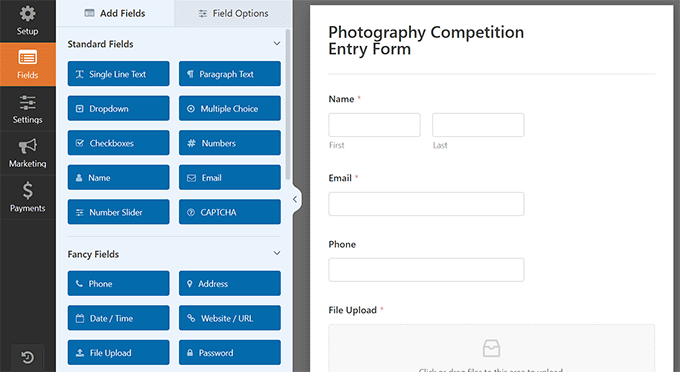
Next, click on the ‘File Upload’ field in the form to open up its settings in the left column.
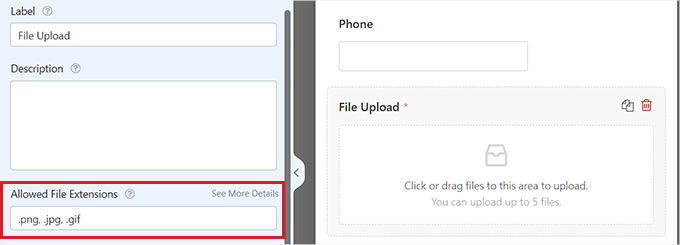
By default, you can upload different types of files in the form, including:
Image files: .png, .gif, .jpgDocuments: .doc, .xls, .ppt, .pdfAudio: .wav, .mp3, .mp4Video: .mpg, .mov, .wmv
All you have to do is type the file formats that you want to accept into the ‘Allowed File Extensions’ box.
For this tutorial, we are going to allow the image formats .png, .gif, and .jpg. Make sure to separate each file format with a comma.
Note: WordPress limits the types of files that can be uploaded to the site for WordPress security reasons. You can add additional file types to WordPress if you want to allow users to upload file types that aren’t normally allowed.
You can also set a maximum file size and a maximum number of files. For our tutorial, we are going to allow people to submit up to 3 photos of up to 50MB each.
If you want to prevent people from submitting the form without attaching their file(s), you can toggle on the ‘Required’ switch. This means the form can’t be submitted unless at least 1 file has been uploaded.

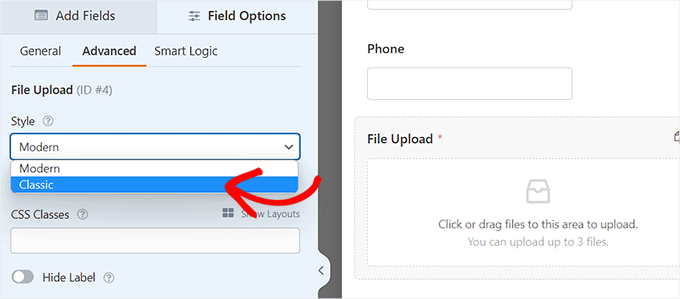
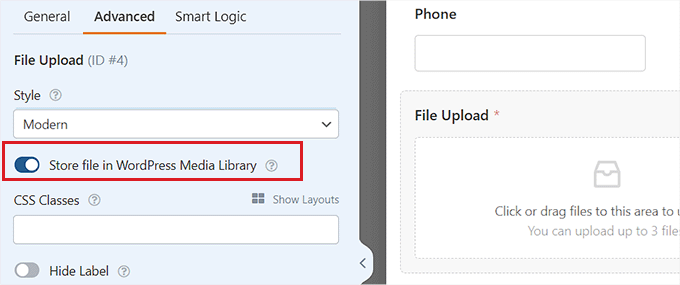
Next, simply switch to the ‘Advanced’ tab from the top.
By default, the File Upload Field uses a modern format that lets users drag and drop their files.
However, if you have limited space for your form, or you prefer a classic upload field, you can change this. Simply select the ‘Classic’ option from the ‘Style’ dropdown menu.
Tip: The classic upload field only allows one file to be uploaded. If you want users to be able to submit more than one file, you will need to add multiple File Upload Fields to your form.
You can also choose to store the submitted files in the WordPress Media Library by toggling on the ‘Store file in WordPress Media Library’ switch. This makes it easy for you to add the uploaded files to a post or page.
For instance, if we are running a photography competition, then we may want to include the best photos when we announce the winner.
Note: The uploaded files will still be saved in your WordPress database, even if you don’t check this box. They are just stored in a separate folder in your WordPress hosting account.
If you want to edit any of the other fields on your form, you can click on them to open the field’s settings in the left column.
You can also add other fields to your File Upload form.
For example, you may want to add a Website/URL field to the form so that users can give you the link to their website.
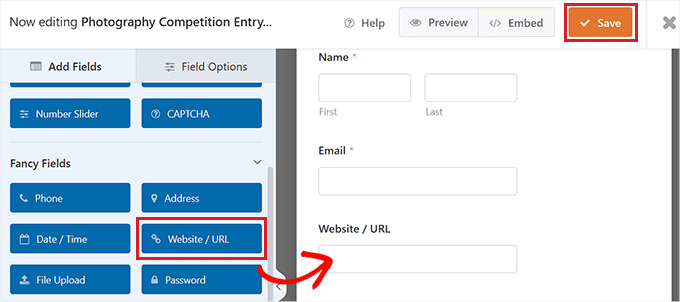
Once you are happy with your form, click the ‘Save’ button in the top right corner of the screen to store your settings.
Setting Up Your File Upload Form’s Notifications
To change the notification settings for the form, you need to open the ‘Settings’ tab in the left corner. Once you are there, simply click on the ‘Notifications’ tab.
By default, the form sends an email notification to {admin_email}.
If you created your WordPress site by yourself, then this will be your email address. If not, then you can delete {admin_email} and type your own email address here instead.
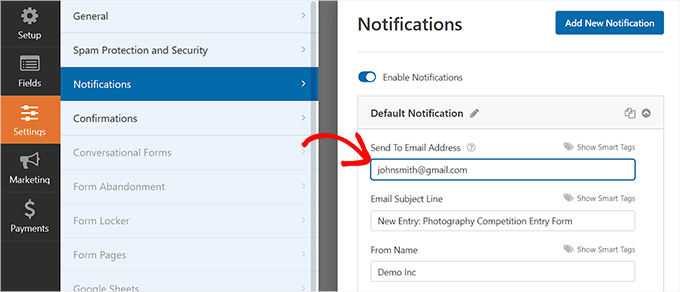
If you are not sure if {admin_email} is your email address, simply visit the Settings » General page from your WordPress admin dashboard.
Once you are there, look for the Administration Email Address. You can now change the admin email address from here.
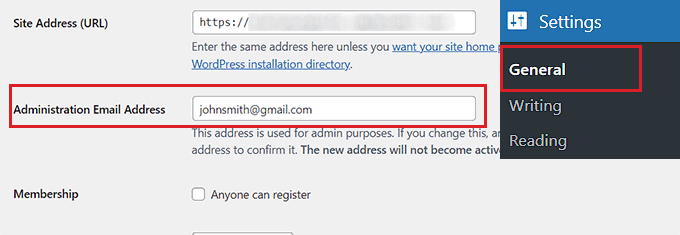
Once you are done, don’t forget to click the ‘Save Changes’ button to store your settings.
If you want the submitted files to be sent to more than one person, then you may want to see our tutorial on how to create a contact form with multiple notification recipients.
You can also change the confirmation message that users see after the form is submitted.
To do this, you need to visit the Settings » Confirmations page from the left column. Then, simply type the message into the ‘Confirmation Message’ box. You can also add formatting like bold and italics.
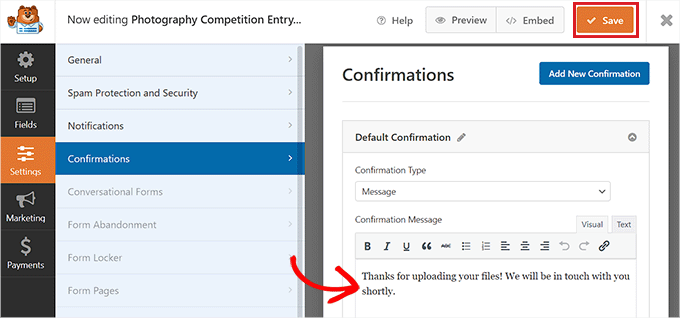
Finally, don’t forget to save your form once you have made the changes.
You can exit the form builder by clicking the ‘X’ in the top right.
Adding the File Upload Form to Your Website
Once you have finished creating your form, you will need to add it to your website.
To do this, you must open an existing or new post or page from the WordPress admin sidebar. For this tutorial, we are going to add the File Upload form to a new page.
Once you are there, click on the Add New Block ‘(+)’ button in the top left corner of the screen and find the WPForms block.
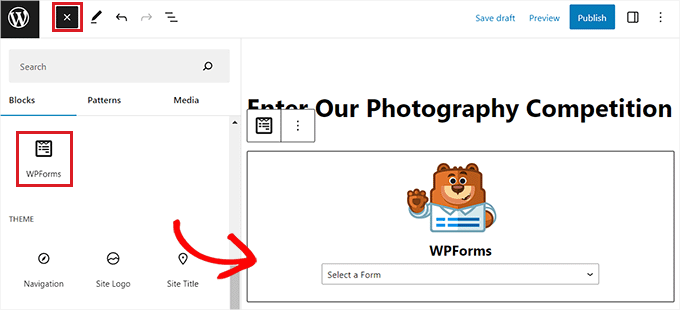
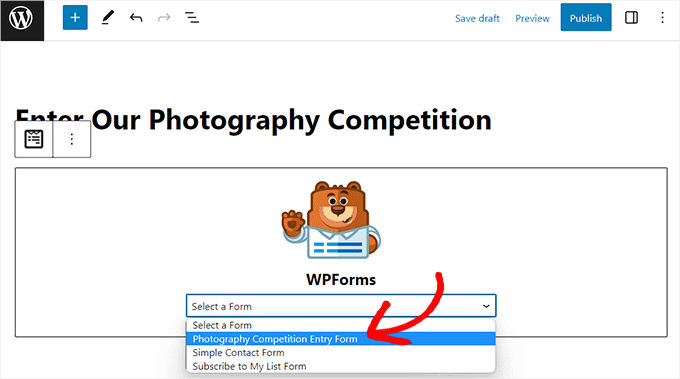
Upon adding the block, you will see a WPForms dropdown menu displayed on the page.
Go ahead and select the File Upload form that you just created.
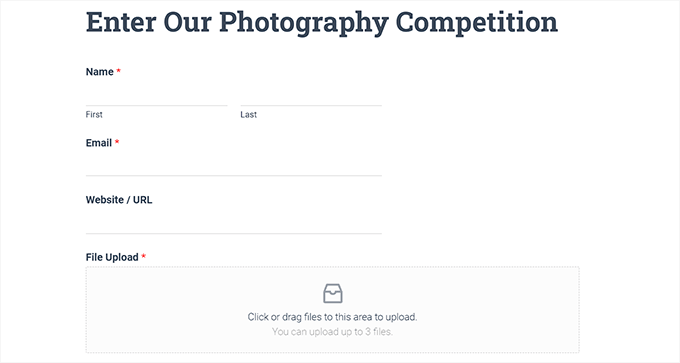
Finally, click the ‘Publish’ or ‘Update’ button to save your changes.
You can now visit your website to see the File Upload form in action.
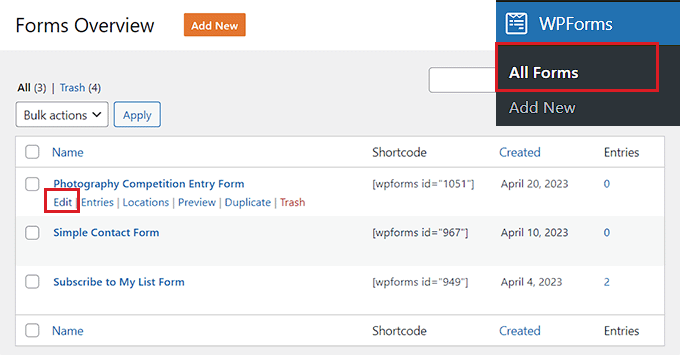
You can also make changes to your form anytime by visiting the WPForms » All Forms page from the admin sidebar.
From here, simply click on the name of the form, or hover your mouse over it and click the ‘Edit’ link to open up the form builder.
When you edit your form, it will be automatically updated on your website, so you don’t need to add it to your page again.
Tip: It’s a good idea to test your form to make sure it’s working as expected. If you don’t get an email notification after creating a form entry, then you can read our step-by-step guide on fixing the WordPress not sending email issue.
Viewing or Downloading the Uploaded Files
When someone sends a file using your file upload form, you can see it in your email inbox or your WordPress dashboard.
With each form entry, you will get an email like this:
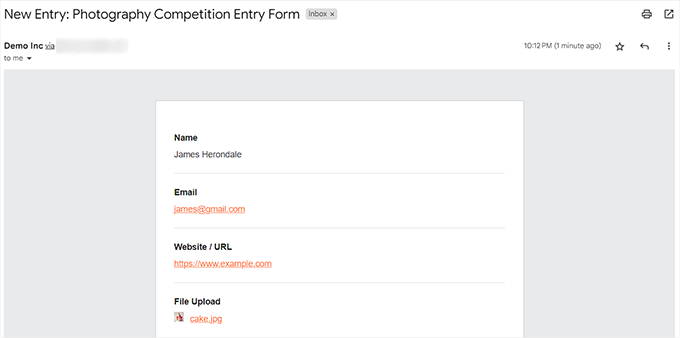
Just click the links to view or download the files themselves.
You can also easily find the files in your WordPress dashboard. Simply go to the WPForms » Entries page and then click on the name of your form.
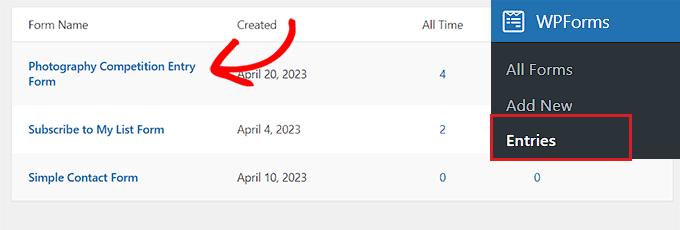
You can see the uploaded files in the table of form entries.
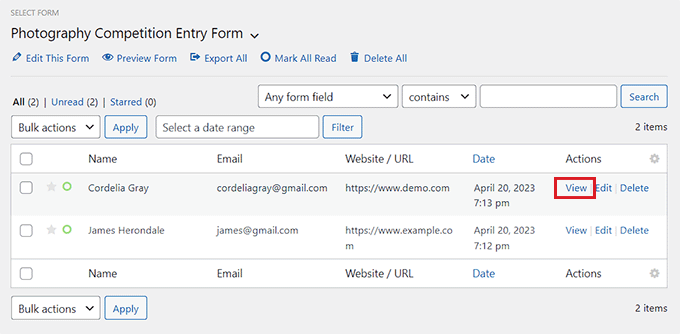
Alternatively, you can click the ‘View’ link to see the full details for each form entry.
We hope this tutorial helped you learn how to create a file upload form in WordPress. You might also want to check out our expert picks for the best WordPress survey plugins and read our guide on how to create an email newsletter.
If you liked this article, then please subscribe to our YouTube Channel for WordPress video tutorials. You can also find us on Twitter and Facebook.
The post How to Create a File Upload Form in WordPress first appeared on WPBeginner.
[ad_2]
Source link