[ad_1]
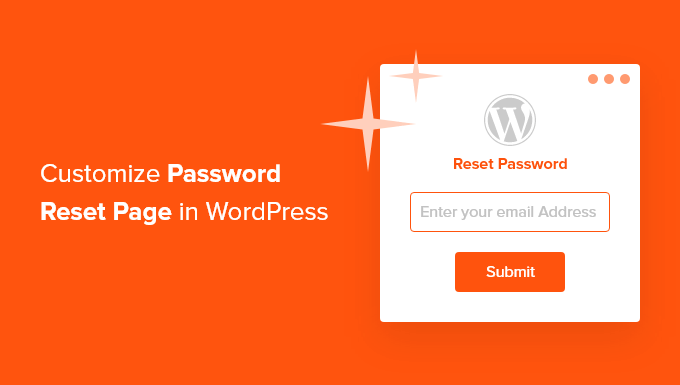
Do you want to create a custom password reset page in WordPress?
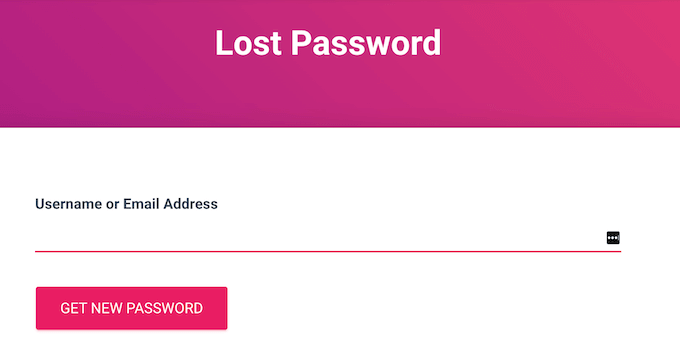
The default WordPress reset password form has the standard WordPress branding and doesn’t change to match your theme. This isn’t the best experience, especially if you run a membership site or client portal.
In this article, we’ll show you how to customize the WordPress reset password page.

Why Customize the Reset Password Page in WordPress?
Your WordPress website comes with a powerful user management system that allows people to create a user account, log in, and reset their password.
By default, these pages show the WordPress branding and logo. Sometimes, this isn’t a major problem especially if you or your team are the only people logging into the admin area.
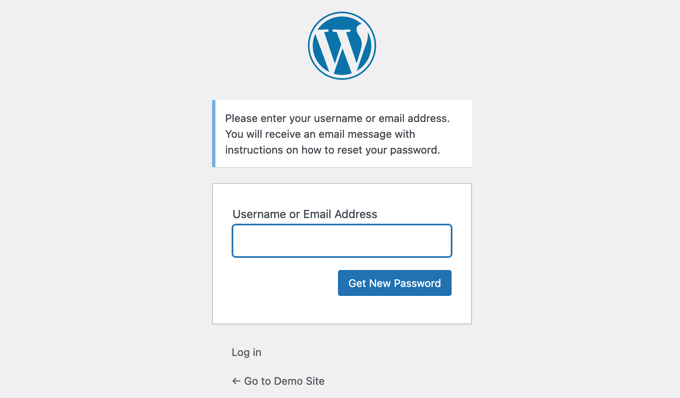
However, if you’re running an online store or membership site, then your customers may also need to log in.
You can provide a much better user experience by customizing these pages to match your website’s design and branding. You might also add extra content such as your logo, or a list of recent posts.
You may have already followed our other guides on how to add a custom user registration form and login page. Now let’s take a look at how to customize the reset password page. Simply use the quick links below to jump straight to the method you want to use.
Method 1: Customizing the Reset Password Page Using Formidable Forms (Easy)
The easiest way to replace the WordPress password reset page is by using Formidable Forms. This plugin lets you replace the default password reset page using a shortcode.
This method doesn’t allow you to edit the password reset form, but you can add your own content around it. For example, you can add text, images, and other content using the standard WordPress post editor.
First, you need to install the Formidable Forms plugin. To learn more, see our step-by-step guide on how to install a WordPress plugin.
Upon activation, you’ll also need to install Formidable Forms Lite. This free plugin provides the core foundation for the premium plugin’s more advanced features.
Once you’ve done that, go to the Formidable Forms » Global Settings page in your dashboard and select ‘Click to enter a license key manually.’
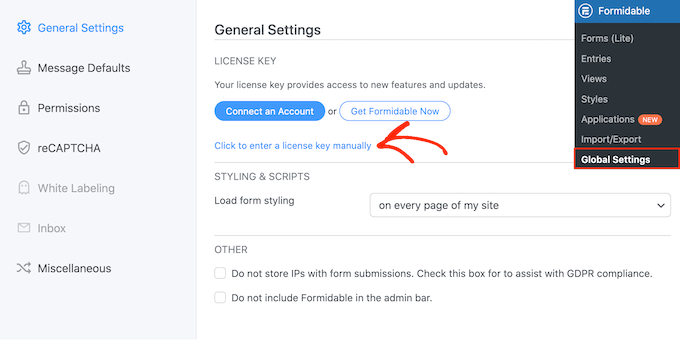
You can find the license key under your account on the Formidable Forms website. After entering this information, go ahead and click the ‘Save License’ button.
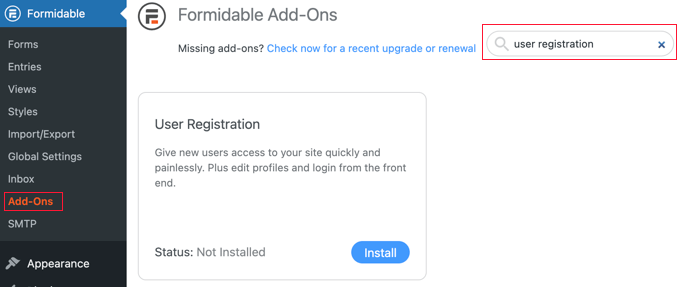
Next, you will need to install the User Registration addon by going to Formidable » Add-Ons. On this screen, find the User Registration addon and click on its Install button.
Now you’re ready to create a custom reset password page by going to Pages » Add New.
To start, give the page a title and then click on the + button. In the popup that appears, start typing ‘Shortcode.’
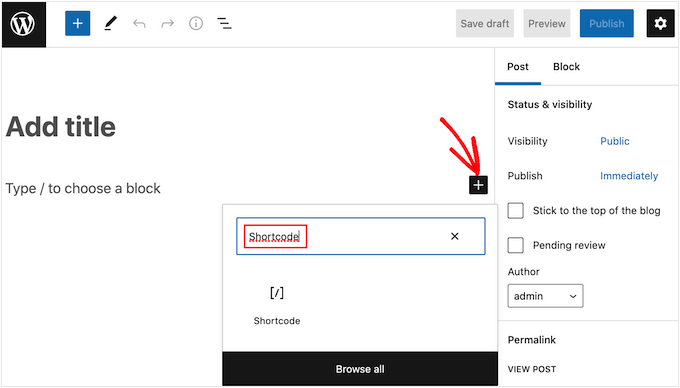
Simply click on the right block to add it to the page.
You can now add the following shortcode: [frm-reset-password].
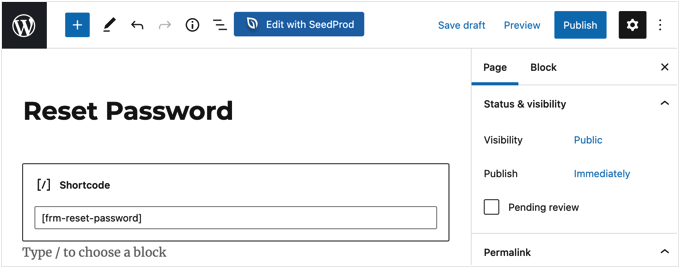
At this point, you can add any other content you want to show on the password reset page.
When you’re happy with how the page is set up, click on the ‘Publish’ button to make it live.
Finally, you need to tell WordPress to use this page, rather than the default password reset page. To do that, head over to Formidable » Global Settings and then click the ‘Registration’ tab in the menu.
From here you just need to open the ‘Reset Password Page’ dropdown and choose the page you just created.
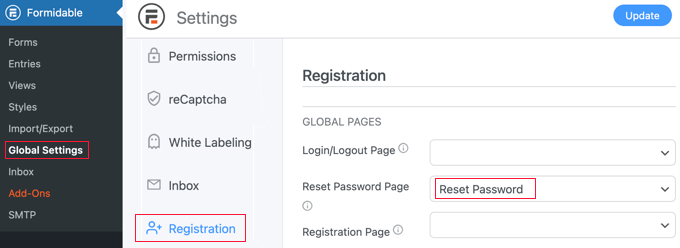
Don’t forget to click the ‘Update’ button at the top of the screen to store your settings.
You can now visit your WordPress website to see the custom reset password page in action.
Method 2: Customize All Membership Pages Using ‘Theme My Login’
To provide a consistent user experience, it’s a good idea to use the same styling on all your membership pages. Theme My Login is a free plugin that allows you to replace the built-in WordPress dashboard, login, logout, registration, forgot password, and reset password pages.
It’s not the most customizable solution, but all its pages will use your WordPress theme.
The first thing you need to do is install and activate the Theme My Login plugin. For more details, see our step-by-step guide on how to install a WordPress plugin.
Upon activation, Theme My Login automatically creates URLs for your custom login, logout, registration, forgot password, and reset password screens. You can see these URLs by going to the Theme My Login » General page.
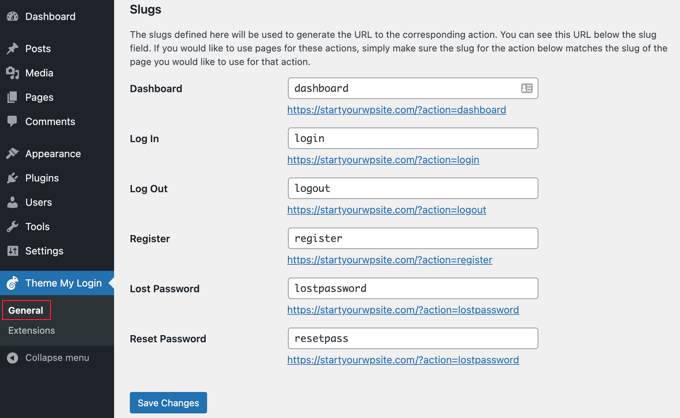
To replace any of these pages, you simply need to create a new page with this exact URL.
To create a custom password reset page, go to Page » Add New. Here, click on the ‘+’ icon and start typing ‘Shortcode.’
When the right block appears, give it a click to add it to the page.
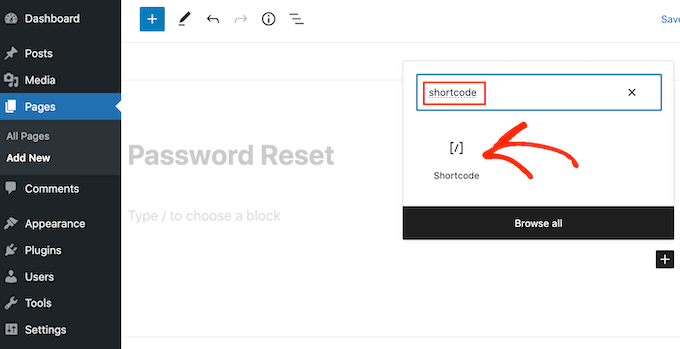
Inside the block, add the following shortcode:
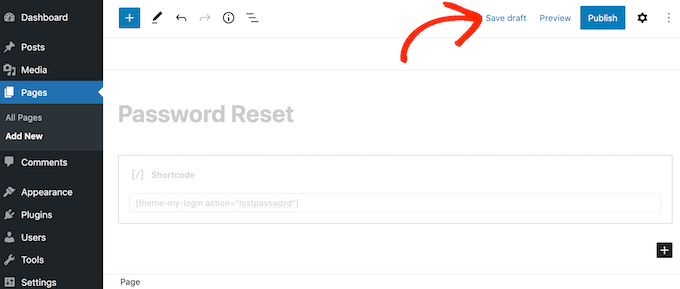
[theme-my-login action=”lostpassword”]
You can now add any extra content you want to show on the password reset page, such as your logo. When you’re happy with how the page is set up, click on ‘Save draft.’
After that, go to Pages » All Pages and find the password reset page you just created.
Simply hover your mouse over the page and click on the ‘Quick Edit’ button when it appears.

In the ‘Slug’ field, type in ‘lostpassword.’
After that, open the ‘Status’ dropdown and select ‘Published.’
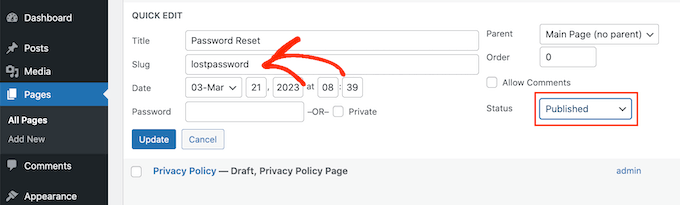
With that done, go ahead and click on ‘Update.’ Now, if you visit your WordPress blog you’ll see the lost password page live.
To replace the other built-in WordPress membership pages, simply follow the steps described above, but make sure you use the right URL slug and shortcode.
For example, if you wanted to create a custom password reset page, then you’d need to use the [theme-my-login action=”resetpass”] shortcode. You’ll also need to change the ‘URL slug’ to resetpassword.
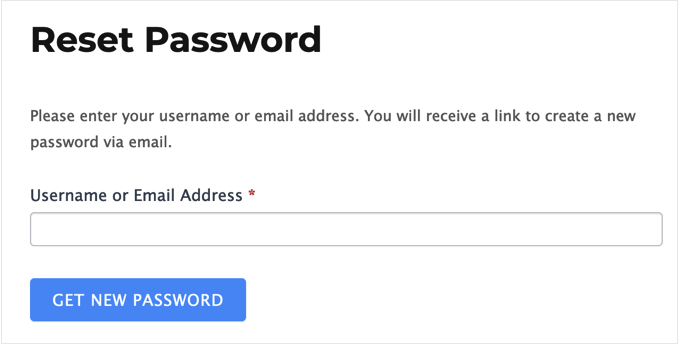
Method 3: Create a Password Reset Page Using WPForms (Completely Customizable)
If you want to replace the default password reset page with a completely custom form, then we recommend using WPForms.
This plugin has a ‘User Password Reset Form’ template that you can customize with your own text, images, and branding. You can even add and remove fields, to collect exactly the information you want from members.
The first thing you need to do is install and activate the WPForms plugin. For more details, see our step-by-step guide on how to install a WordPress plugin.
Upon activation, head over to WPForms » Settings and enter your license key. You can find this information under your account on the WPForms website.

After entering the license key, you’ll need to install the User Registration addon, which allows you to create custom user registration, password reset, and login forms for your site.
In the dashboard, go to WPForms » Addons and find the User Registration Addon.
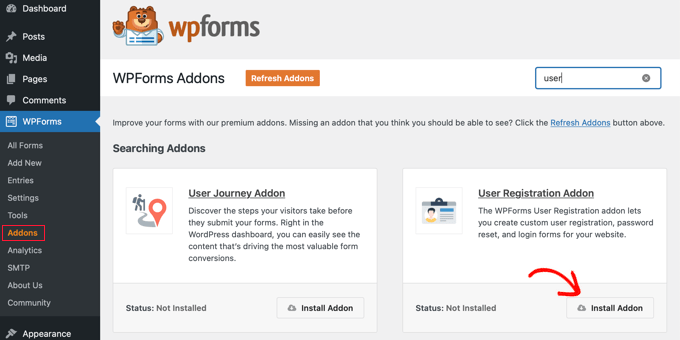
Simply click on ‘Install Addon’ to download it, and then click on ‘Activate’ to make it live.
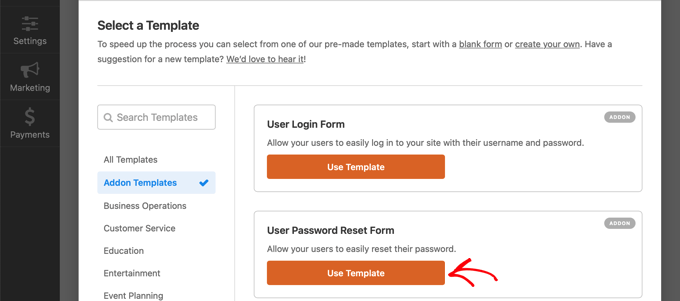
You are now ready to create your own custom password reset form by going to the WPForms » Add New page. Here, type in a title for the new form.
With that done, scroll to the ‘User Password Reset Form’ template and click on its ‘Use Template’ button.
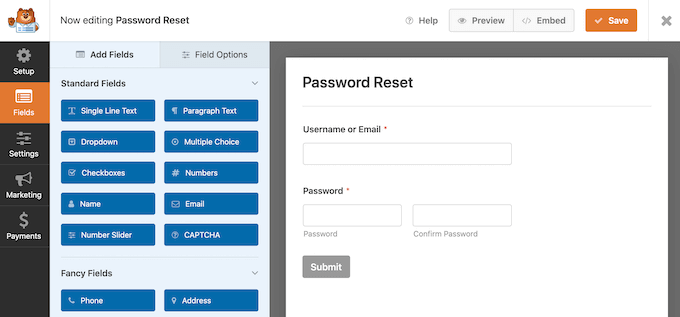
WPForms will now load the User Password Reset Form template.
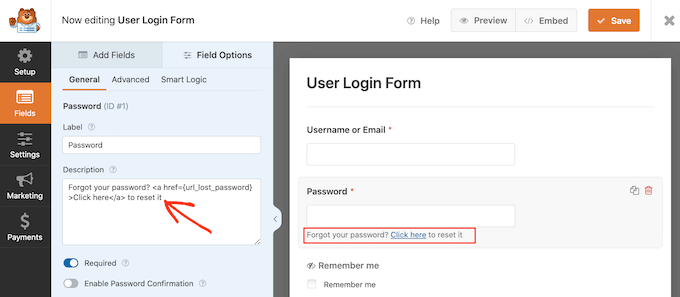
To customize any field with your own text, label, or description, simply click to select it and then use the settings to make your changes.
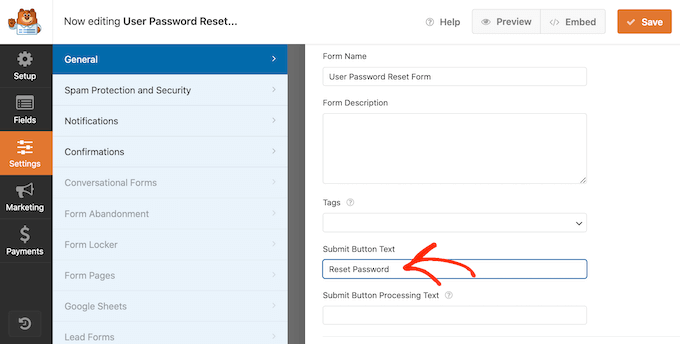
For example, the template has a ‘Submit’ button. To show a different button label, simply click to select the field and then type a new message into ‘Submit Button Text.’
You can also change what happens when a user submits their password reset request by going to Settings » Confirmations.
Here, open the ‘Confirmation Type’ dropdown and choose whether to redirect the user to a different page or URL, or simply show a message asking them to check their inbox for a password reset email.
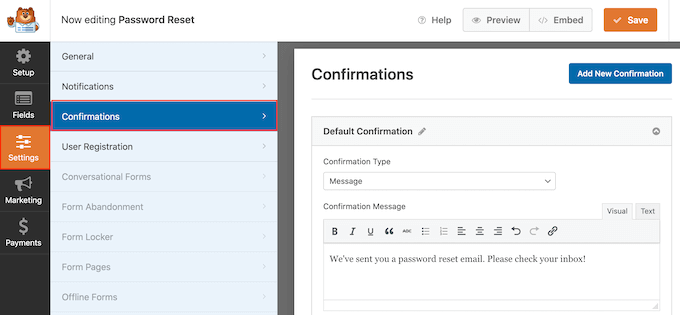
You can also customize the message by typing it into the small text editor. For example, you might remind users to check their spam folders.
Pro Tip: If your emails are regularly getting sent to spam, then we recommend using an SMTP service provider to improve your email deliverability rates.
When you’re happy with how the form is set up, click on the ‘Save’ button at the top right corner of the screen.
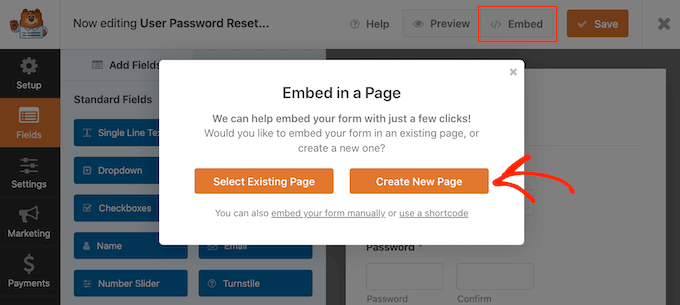
To replace the default WordPress password reset page, we’ll need to place the form on a page with the slug ‘onepassword.’ The easiest way to do this is by clicking on the ‘Embed’ button. Then, select ‘Create New Page.’
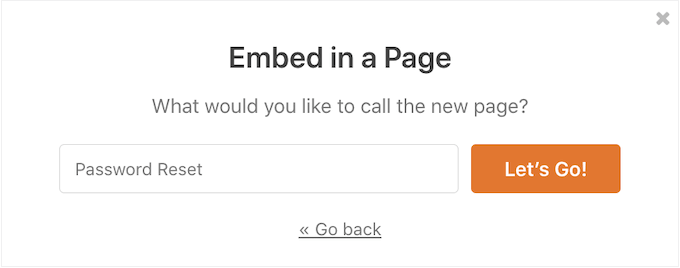
You can now type in a title for the new page. We’ll be changing the slug in a later step so you can use anything you want.
With that done, click on ‘Let’s Go.’
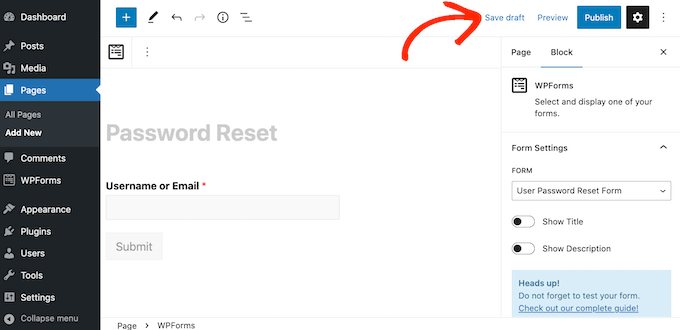
This takes you to the WordPress page editor, with the form already added to the new page. You can now make any changes to this page, such as adding more text, a custom logo, or categories and tags.
When you’re happy with how the page looks, click on the ‘Save draft’ button.
After that, go to Pages » All Pages and find the password reset page you just created.
Simply hover your mouse over the page and click on the ‘Quick Edit’ button when it appears.
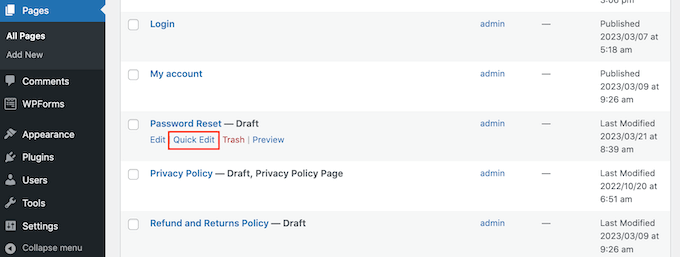
In the ‘Slug’ field, type in ‘lostpassword.’
After that, open the ‘Status’ dropdown and select ‘Published.’
Now, we need to set up a redirect that will send visitors to our custom password reset page, rather than the built-in WordPress page. The easiest way to do this is by using the free WPCode plugin.
WPCode is the best code snippets plugin used by over 1 million WordPress websites. It makes it easy to add custom code in WordPress without having to edit the functions.php file.
With WPCode, even beginners can edit their website’s code without risking mistakes and typos that can cause many common WordPress errors.
The first thing you need to do is install and activate the free WPCode plugin. For more details, see our step-by-step guide on how to install a WordPress plugin.
Upon activation, head over to Code Snippets » Add Snippet.
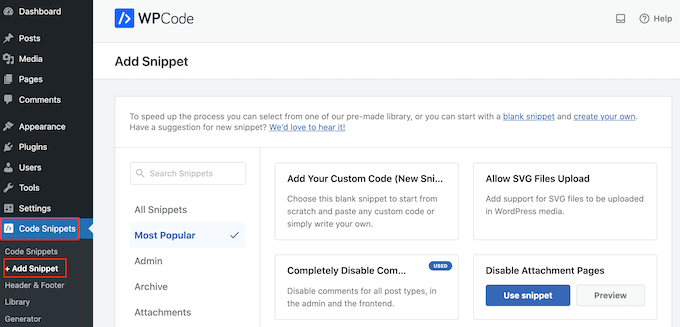
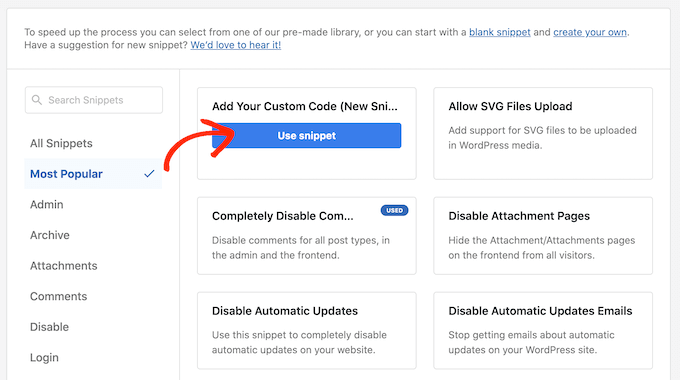
Here, simply hover your mouse over ‘Add Your Custom Code.’
When it appears, click on ‘Use snippet.’
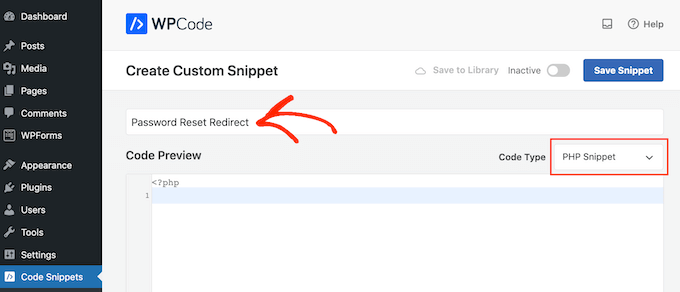
To start, type in a title for the custom code snippet. This can be anything that helps you identify the snippet in the WordPress dashboard.
After that, open the ‘Code Type’ dropdown and select ‘PHP Snippet.’
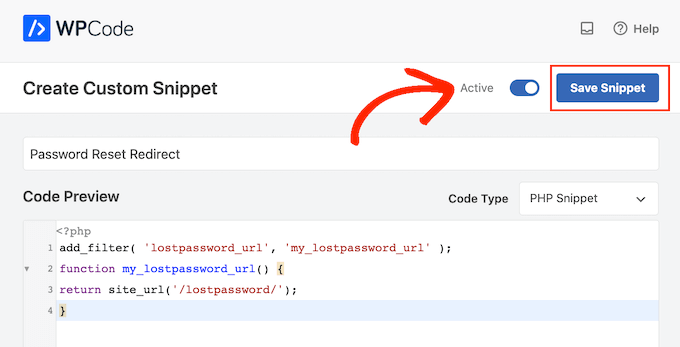
In the code editor, add the following code snippet:
function my_lostpassword_url() {
return site_url(‘/lostpassword/’);
}
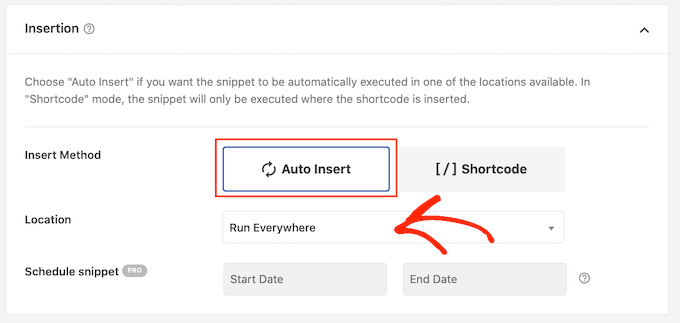
Next, scroll to the ‘Insertion’ section. WPCode can add code to different locations, such as after every post, frontend only, or admin only.
We want to use the custom PHP code across our entire site, so click on ‘Auto Insert’ if it isn’t already selected. Then, open the ‘Location’ dropdown menu and choose ‘Run Everywhere.’
After that, you’re ready to scroll to the top of the screen and click on the ‘Inactive’ toggle, so it changes to ‘Active.’
Finally, click on ‘Save Snippet’ to make the PHP snippet live.
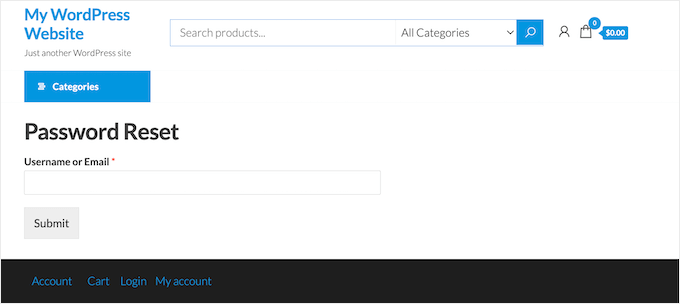
Now, try visiting the built-in WordPress login screen.
If you click on the ‘Lost your password?’ link, then you’ll be redirected to the custom password reset page you just created.
Depending on how your site is set up, you may need to update the password reset links on other pages.
If you’ve created a custom login page for WordPress using a plugin such as WPForms, then we also recommend adding the new password reset link to this form.
We hope this tutorial helped you learn how to customize the WordPress reset password page. You may also want to learn how to create a free business email address or check out our list of must-have plugins to grow your site.
If you liked this article, then please subscribe to our YouTube Channel for WordPress video tutorials. You can also find us on Twitter and Facebook.
The post How to Customize the WordPress Reset Password Page first appeared on WPBeginner.
[ad_2]
Source link