[ad_1]
Are you looking to download WordPress to create your website?
WordPress is an open-source project, and you can download it for free. Although many web hosting providers now install WordPress for you automatically, you can always download and install it manually on your own server or computer.
In this article, we’ll show you how to download WordPress for free, as well as what you need to do next to get it installed.
")
Why Is WordPress Freely Downloadable?
WordPress is free for anyone to download and use to build any kind of website without any restrictions. That’s because WordPress is an open-source community project that tens of thousands of talented people contribute to.
According to our WordPress market share report, over 43% of websites on the internet use WordPress.
There is a core team of developers that lead the project development, but anyone can contribute patches, fix bugs, make features, suggest features, and more.
Note: When we speak of the WordPress open-source project, we’re talking about self-hosted WordPress.org. This is different from the WordPress.com hosting service. For more details, see our comparison between WordPress.com vs WordPress.org.
While the core software is free, there are still costs involved in making a WordPress website. The cost of a website depends on your budget and goals, but it can be quite affordable.
The main costs will be a domain name, which will be your website’s address on the internet, and website hosting, which is where you will store your website files and database.
The good news is that most website hosting providers will automatically install WordPress for you, and you will probably never need to manually download or install it yourself.
However, if you are an intermediate or advanced user, then you always have the option of installing WordPress manually. That’s handy if you wish to do a custom WordPress install, or have WordPress running on your own server or computer.
With that being said, let’s take a look at how to download WordPress for free, along with what you need to do next. Here are the topics we’ll cover in this tutorial:
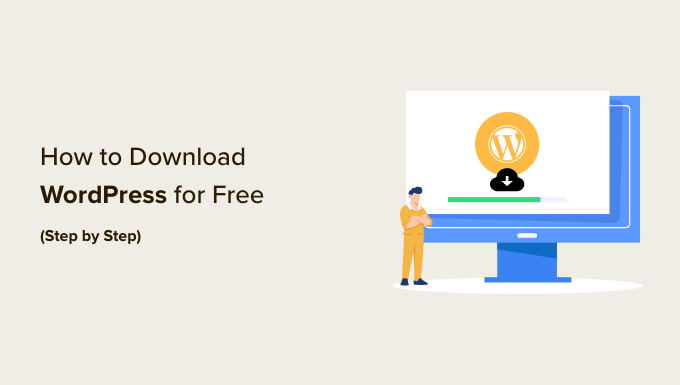
How to Download WordPress for Free
First, you need to visit the WordPress.org download page. This page offers two options:
You can download WordPress and install it yourself as we’ll cover in this article, or You can set up WordPress automatically with a hosting provider.

We recommend most users take the second option. Reputable hosting providers such as Hostinger, Bluehost, Dreamhost, or SiteGround will install WordPress for you automatically in just 5 minutes. To learn how that works, see our complete guide on how to install WordPress.
But if you’re an advanced or intermediate user and want to install WordPress manually, then go ahead and click the ‘Download WordPress’ button.
This button will also indicate which version of WordPress you are downloading. In this case, it is WordPress 6.1.1.
After downloading the file from WordPress.org, you just need to unzip it. This will create a ‘wordpress’ folder on your computer that contains all the files you need to create a WordPress website.

Now that you have downloaded WordPress for free, you can use it to install or reinstall WordPress on your server or create a local WordPress installation on your computer.
How to Install or Reinstall WordPress Manually on a Web Server
Installing WordPress manually requires a few added steps, but may be easier than you expect. You will need the files you downloaded and an FTP client or a web-based file manager.
You can also use this manual method when updating WordPress or uninstalling and reinstalling WordPress.
Uploading the WordPress Files to Your Web Server
Your first job will be to use FTP to upload the WordPress files you have downloaded to your web server. You can think of FTP as file management for the internet.
Most web hosting providers offer an FTP server and send your FTP username, password, and other details via email when you sign up for your WordPress hosting account. You can also find your ‘FTP Accounts’ information in your hosting account’s cPanel or Site Tools dashboard.

As an alternative to FTP, most hosting providers also provide a browser-based file manager application. This can be accessed from your web hosting control panel as pictured above.
We’ll use the FileZilla FTP client because it’s free and works on Windows and Mac.
First, you need to open FileZilla and select File » Site Manager from the menu. Next, you should click the ‘New site’ button and provide a title for your website. Once you’ve done that, you should enter the login details in the ‘User’ and ‘Password’ fields.

From the Protocol dropdown, you should select ‘SFTP’ if your hosting provider supports it, otherwise leave it as ‘FTP.’
Next, you just type your domain name such as ‘example.com’ in the Host field and select ‘Normal’ for the Logon Type.
Once you’ve entered those details, you can click on the Connect button to continue. FileZilla will now attempt to log in to your website using the credentials you entered.
Once connected, you will see two columns of files and folders. The left column lists the Local files on your computer. The right column lists the Remote files on your website. This layout lets you easily transfer files to and from your website.

In the left column, you need to locate the ‘wordpress’ folder that you downloaded and unzipped earlier. In the right column, you need to locate the folder on your website where you need to upload these files:
If you want to install WordPress on your root domain name (like example.com), then you need to upload WordPress files to your website’s root directory. Usually, this directory is called /public_html/.On the other hand, If you want to install WordPress in a subdirectory (like example.com/blog), then upload it to a folder /public_html/blog/.
Now you simply select all the files on the left. After that, you need to right-click the files and select Upload from the menu, or simply drag the files to the right column.

Your FTP client will now upload the WordPress files to your website.
Creating Your WordPress Database
Once the WordPress files are uploaded, you need to go to your hosting control panel to create a database. We’ll show you how to do that using cPanel, but if your hosting provider has a different control panel, then just look for the ‘phpMyAdmin’ option.

Clicking the ‘phpMyAdmin’ icon will open the phpMyAdmin application in a new tab. In the phpMyAdmin dashboard, click on the Databases tab.
You can now type a name for your database into the ‘Database name’ field. You can name your database anything you want. Make a note of the name because you’ll need it later.
For this tutorial, we will call our database test_db.

After typing your database name, you should click the ‘Create’ button.
PhpMyAdmin will now go ahead and create your database.

Now that you’ve uploaded the WordPress files to your website and created a database, everything is ready to install WordPress.
Installing WordPress
To start installing WordPress, simply go to your website’s URL, such as example.com or www.example.com. This will open the WordPress installation wizard.
You will see the language selection page. You can choose a language here so that the rest of the installation is displayed in your own language. You can also use English for now and then later change the language or add multiple languages.

Next, you can click the ‘Continue’ button to proceed.
You will now see some instructions about the installation process. You will see a list of information you need, including the database name, username, password, and host.

After reading the screen, you should click the ‘Let’s go!’ button to continue. The setup wizard will now show you a form where you can enter the database information you created earlier.
Once you’ve done that, make sure you leave the Database Host field as the default ‘localhost.’ This just means that the database and website are hosted on the same server. Unless you changed the database prefix, the Table Prefix field should say wp_.

After filling in this information, you need to click the ‘Submit’ button. WordPress will connect to your database and show you a success message.
To move on to the next step, simply click on the ‘Run the installation’ button. WordPress will now create tables in your database and then send you to the next step of the installation.

The next screen will ask for some additional information.
You will need to enter the Site Title that you wish to display at the top of your website, such as your business name. You can change the title in your WordPress dashboard at any point.
You’ll also need to create a username and password. This is the login information you’ll use to access your WordPress dashboard.

You can also type your email address into the Your Email field. This is the address where WordPress will send all of its admin emails.
If you don’t want your website to be visible to search engines at this point, then you can check the box next to search engine visibility.
Later when you are ready you can change this from WordPress settings. If you are unsure about what to do, then simply leave it unchecked.

After completing this form, click the ‘Install WordPress’ button. WordPress will now run the installation and after a few moments, you should see a ‘Success!’ message.
Now you can sign in to your WordPress dashboard by clicking on the ‘Log In’ button.

Congratulations, you have successfully installed WordPress by downloading the core software for free and then installing it manually.
How to Install WordPress Locally on Your Computer
You can also use the WordPress core files you downloaded to install WordPress on your own computer. This gives you the chance to try out WordPress before starting your blog or website. It’s also a great way to experiment with themes and plugins risk-free.
Note: If you install WordPress locally on your computer, then you will be the only person who can see it.
For WordPress to successfully run on your computer, you first need to install the software that WordPress relies on. This includes the PHP server-side programming language, the Apache web server, and the MySQL database management system.
Now, installing all these software independently and making them work with each other sounds like a daunting task.
Luckily, there are free development tools that make it super easy to install them as one package even for non-techy users. Once you install one of these applications, then you will be able to install WordPress using a method similar to the above.
We recommend using Local WP to install WordPress on your computer. Here are detailed tutorial on how to install WordPress on Windows, and how to install WordPress on Mac.

Note: When you’re using Local WP, you don’t need to manually download and install WordPress on your computer. It can help you do that with just a few clicks.
We hope this tutorial helped you learn how to download and manually install WordPress for free. You may also want to learn how to keep your WordPress site secure, or check out our list of must-have plugins to grow your site.
If you liked this article, then please subscribe to our YouTube Channel for WordPress video tutorials. You can also find us on Twitter and Facebook.
[ad_2]
Source link