[ad_1]
Creating an online storefront is already easy thanks to WooCommerce. But what if you need to make sure that only customers in select geographic areas can buy your products? Or perhaps you’d like to use flat shipping rates for local orders? Or if you want to offer in-store pickup options?
The quick and easy solution for advanced WooCommerce maps and shipping is LPAC – the Location Picker at Checkout for WooCommerce. This add-on is your all-in-one checkout solution that adds revenue driving features for saved addresses, checkout autofill, Google maps integration, delivery areas settings and more.
But that’s just scratching the surface, so let’s take a look at what LPAC can do and why it’s a fantastic WooCommerce extension that store owners should consider.
WooCommerce Checkout with Google Maps Integration
WooCommerce is the number one used WordPress e-commerce plugin, and it’s no surprise. It’s free and offers core features to make starting an online store quick and easy. But as great as WooCommerce is, there is still room for improvement. Especially when it comes to map capabilities. LPAC is a great add-on that fills this gap, and offers powerful Google maps integration and options for your store.
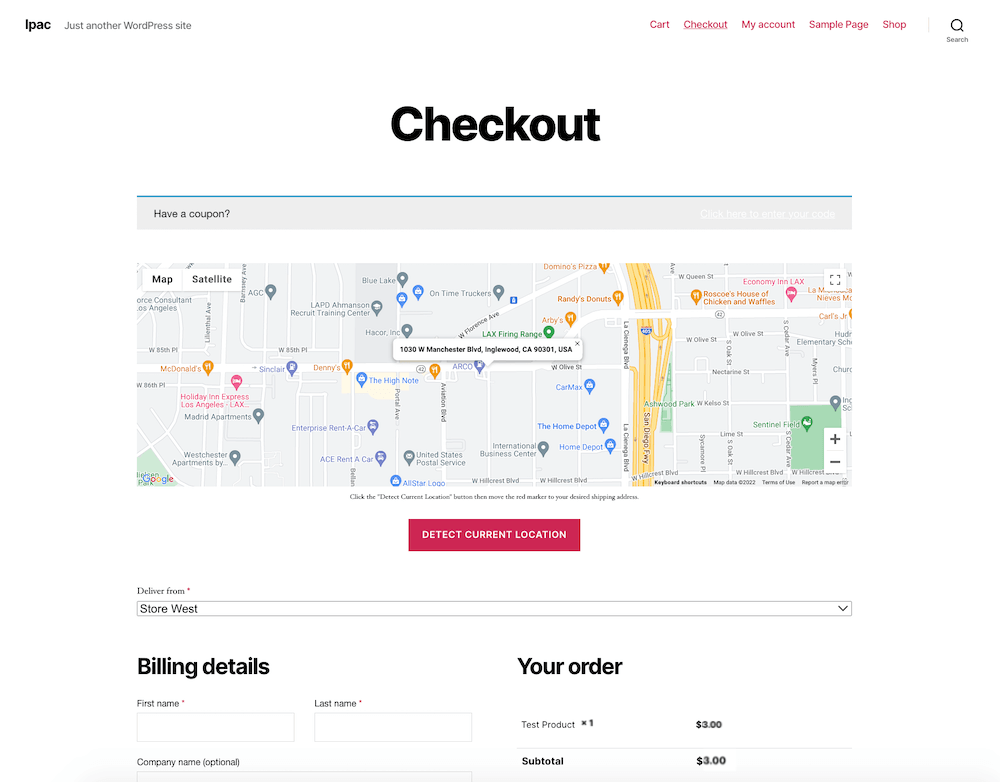
Having the option for a map at checkout is helpful for customers, especially if you decide to use LPAC to create custom shipping workflows based on distance. This way customers can see estimated costs or delivery times based on their location. And, as shown in the screenshot above, customers can also use maps to select where their delivery comes from in the case that your business has multiple locations.
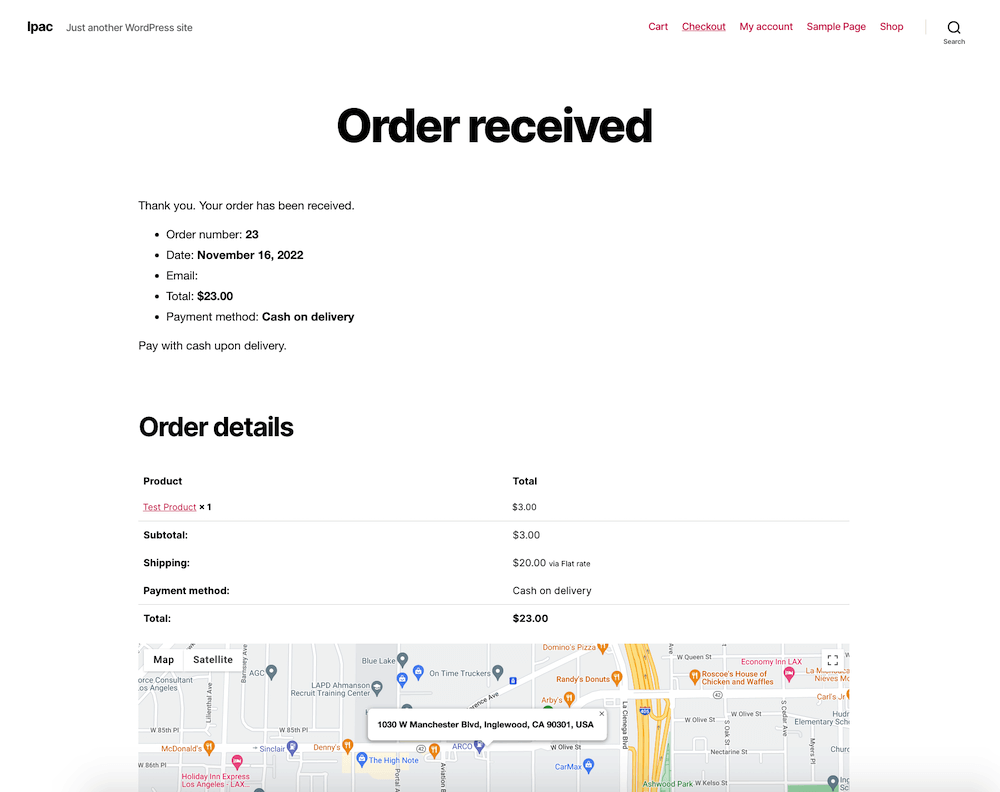
And after checkout, a map is still extremely useful. With LPAC you can use the option to display a map on the WooCommerce “Order Received” page to see where the new order is going, and enable a similar option on the “Orders” section for customers. Or you can include a static Google map in their order confirmation email (note there is an extra step to this option) or add a barcode or button with a link to a map.
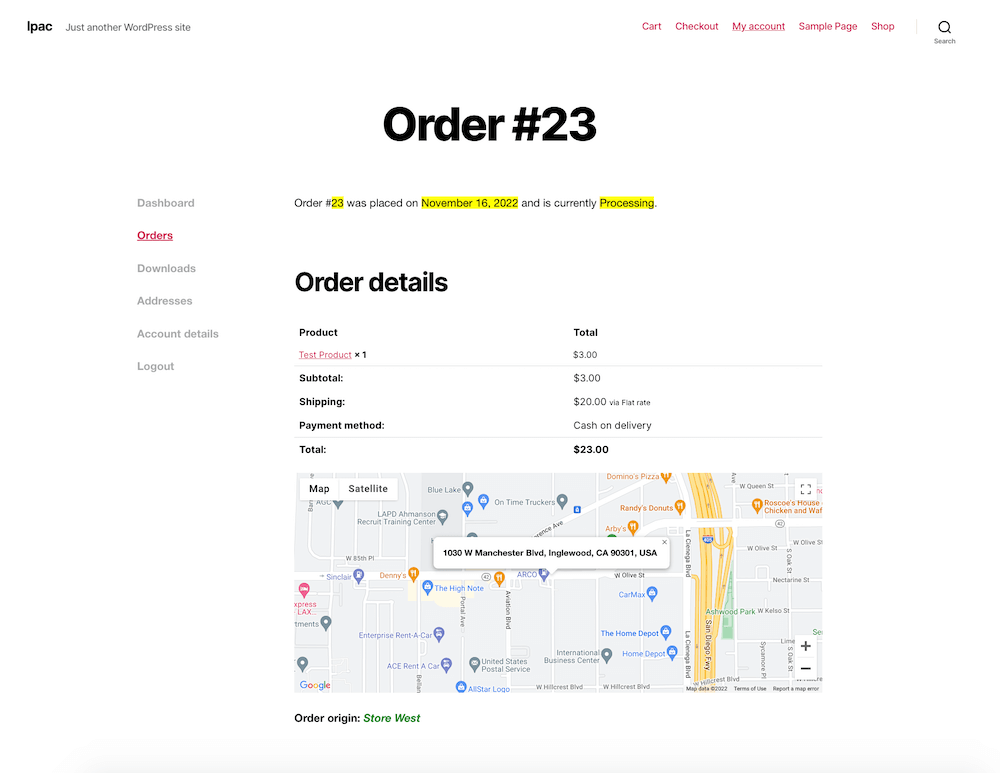
For customers, this reassures them that their correct address was used and could also be used to estimate delivery time (again, depending on the shipping options you add). And being able to check maps on past orders makes it easy to see which location they’ve ordered from before (in our screenshot it was the “Store West” location).
For store owners, being able to see a placed order map is helpful for a few reasons. The first it that logistically it helps to know where an order is headed so you choose a proper delivery method. Whether you’re putting together a batch of packages to be sent off through the mail, or assigning a local food delivery to one of your staff members, having an order map is key. Heck, you can even enable a LPAC option for directions as well as define your preferred real-time driving platform, so the customer address will open in Google Maps or Waze.
And second, maps can offer insight into which of your locations are making the most sales. This way you can better plan inventory, staff and even special offers or promotions.
Custom Google Maps & Markers
With LPAC you can also add default coordinates and zoom for your maps, as well as clean up addresses returned by the Google API automatically (by removing the plus code).
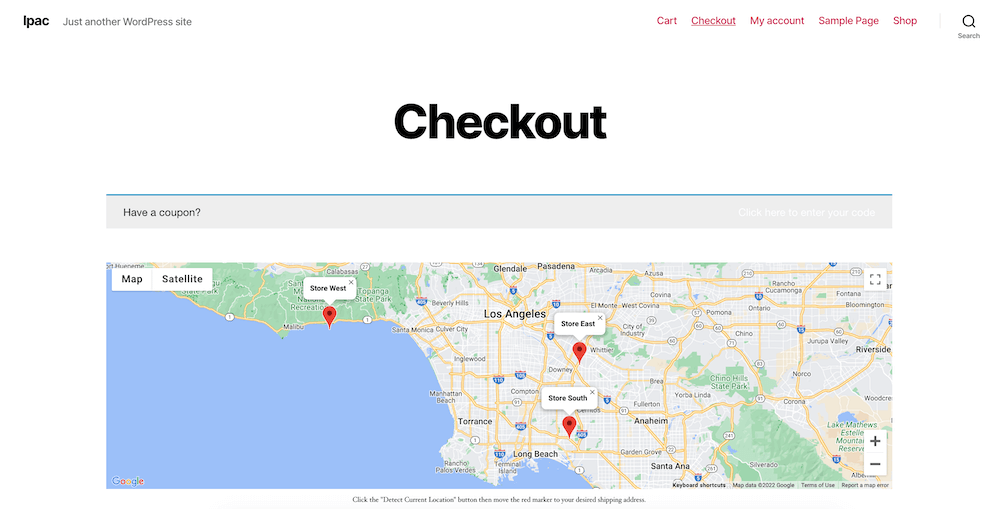
Here’s a map we created that is at the top of the checkout page and is 400px tall, 100% wide and set to a 10x zoom
But that’s not all, there are even built-in options for map customizations. Use settings for color, map px height or % width, store location markers, location labels, custom marker icons, and more. This is a great way to make sure your maps fit your online store design or overall brand.
Store Locations Feature
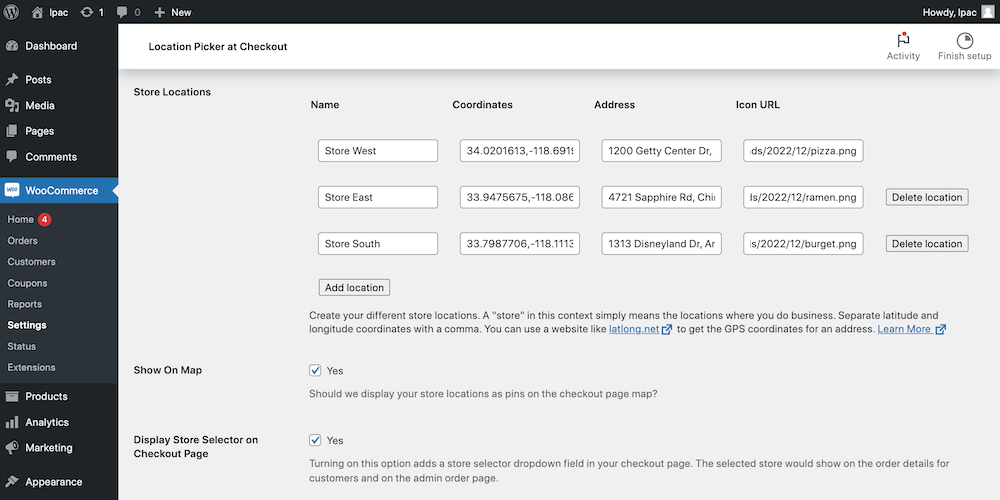
For shop owners with more than one store, you’ll be happy to know that LPAC also supports multiple locations. Simply add your locations in the main LPAC settings for “Store Locations” then enable options to show store location pins on the checkout map. And yes, you can give each location a custom pin. Just upload the unique marker icons for each of your locations to your media library, copy the URL and paste it in the “Icon URL” section when adding your store locations.

You can also add a store selector (a great option if you offer same date delivery), display a selected store’s information in order emails, etc.
Revenue Driving Checkout Settings
As you can see, having maps for your checkout can be helpful, but maybe you’re still not sold on how LPAC can benefit your business. Well did you know that LPAC’s features can also help you make more sales? Here’s how.
Autofill
With LPAC customers can complete checkout faster. With LPAC installed and active the option to detect location will be added to the checkout page. So when a user clicks on the “Detect Current Location” button it will use their browser’s geolocation to figure out where they are and auto-populate address fields.
Saved Addresses
LPAC also offers another time saving solution for returning customers. As they complete checkout, customers will be asked if they’d like to name and save the address for future use. This will significantly reduce friction and speed up checkout even more as they continue to return to your site or if they decide to order from multiple locations.
Visibility Rules
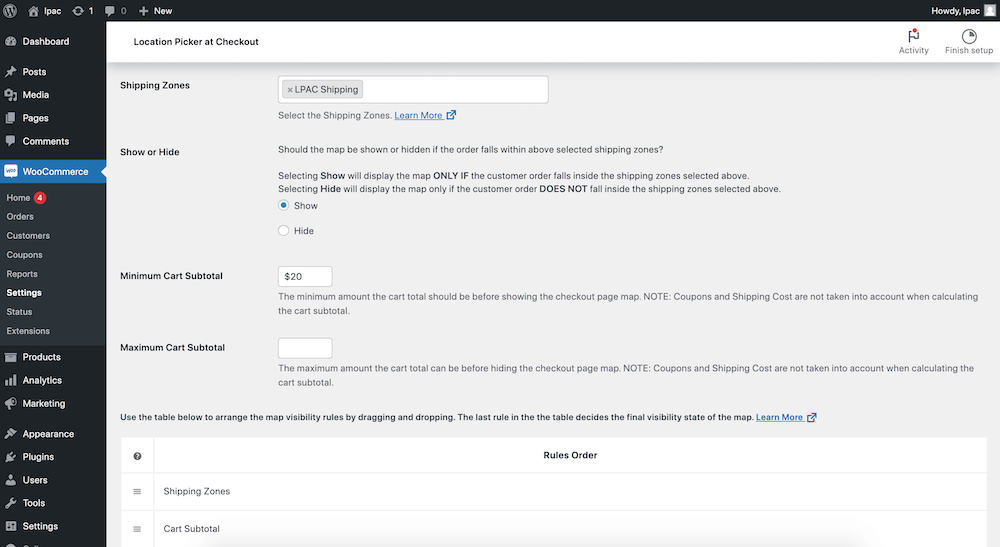
You can also convince shoppers to make it all the way through checkout with maps displayed based on conditions set by the store owner. Choose to show or hide LPAC maps based on requirements like order subtotal, shipping, coupon etc. For example, the map can be hidden unless the order is with a set shipping region and the cart reaches a minimum amount.
Compatible with Custom Checkout Page Plugins
And lastly, LPAC is compatible with a number of checkout enhancing plugins. These include sales funnels to help usher customers through various steps before checkout, restaurant ordering systems, custom field editors and more:
Streamlined Shipping Cost Options

In addition to the revenue driving features mentioned, there are also shipping settings that can be utilized to entice customers while also ensuring that your business charges enough to cover costs.
With LPAC you can better serve customers by offering clear, preset shipping options according to a number of factors. Use shipping workflows to offer different shipping prices based on customer location (just note, you should only choose one method at a time as pricing inconsistencies may arise if you enable multiple workflows at a time). Shipping Methods/Workflows currently supported by LPAC include the following:
Region/Zone
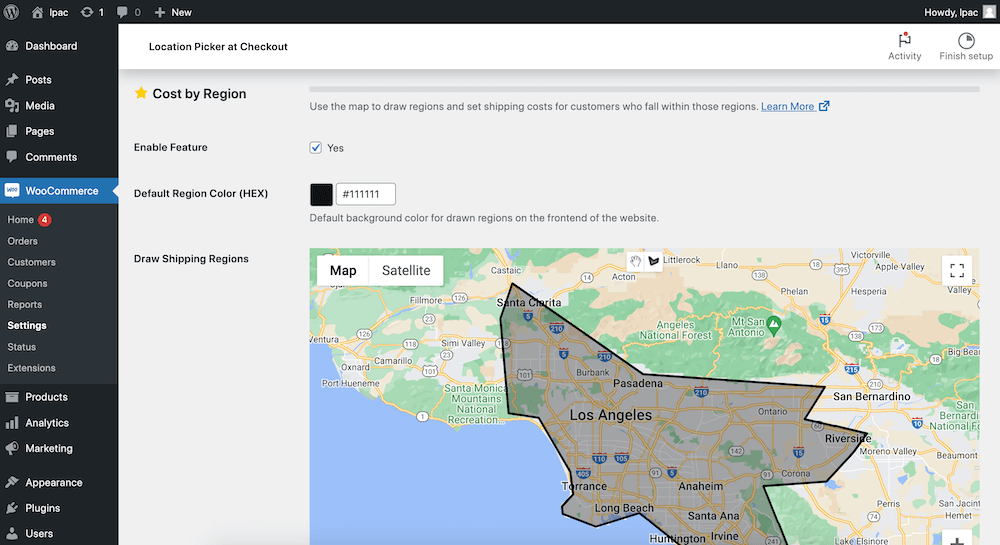
With this option you can limit orders to within a set delivery zone. This could be a great option for businesses focused on local orders (such as those in the food service industry) or if you’re a freelancer that doesn’t want to travel too far from home. But it would also be a very good choice for companies selling regulated goods, like CBD products. This way you can set clear boundaries of where you deliver so that you can be sure you’re following all applicable rules.
Creating your zones is easy using the built-in “Draw Shape Tool” for your Shipping Region. Simply use the tool to point & click and create your zones like geofencing. You’re also asked to add a color and price as you create your zones.
Distance
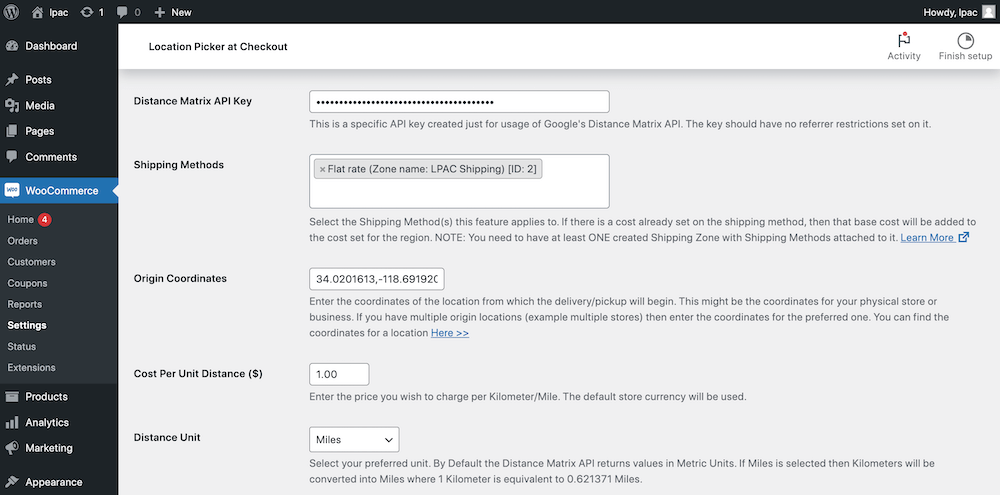
With this feature you can calculate the shipping price for an order based on the customer’s distance away from your store(s). For example, you could charge $1 per mile.
With this option you can add various shipping methods to WooCommerce then assign a method to an order based on calculated distance according to the user’s delivery address. This is a fairly typical delivery setup and uses Google’s API to make calculations, so you need to create a separate Google API key for that particular feature (read more in their shipping by distance documentation).
This shipping option also includes settings for max distance, free shipping distance, and error messages for users outside of your delivery range.
Distance Range
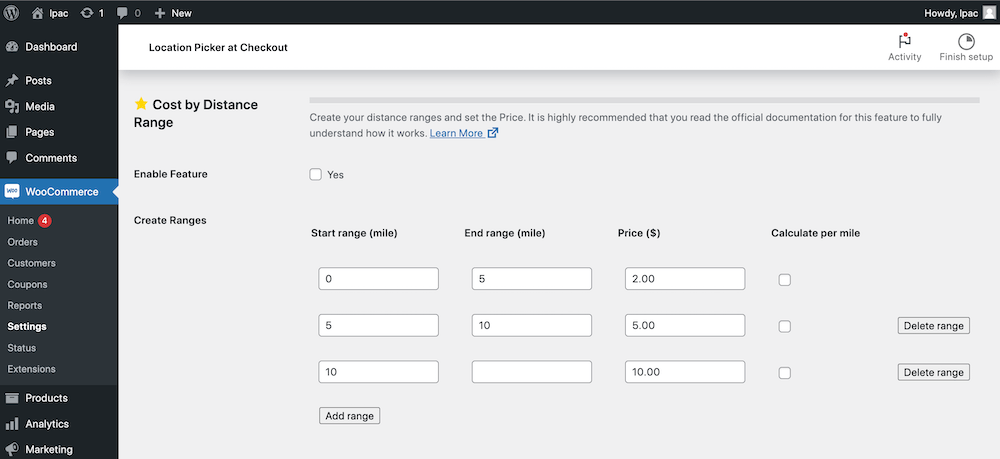
Shipping according to distance range allows you to add general prices based on distance ranges. So rather than recalculating a price based on an exact distance, a general shipping price will be used (e.g. you could make deliveries within 5 miles/kilometers just $2, 5-20 miles/kilometers $5, and anything over 20 miles/kilometers $10 – and you can even add a distance range cap too!).
Store Distance
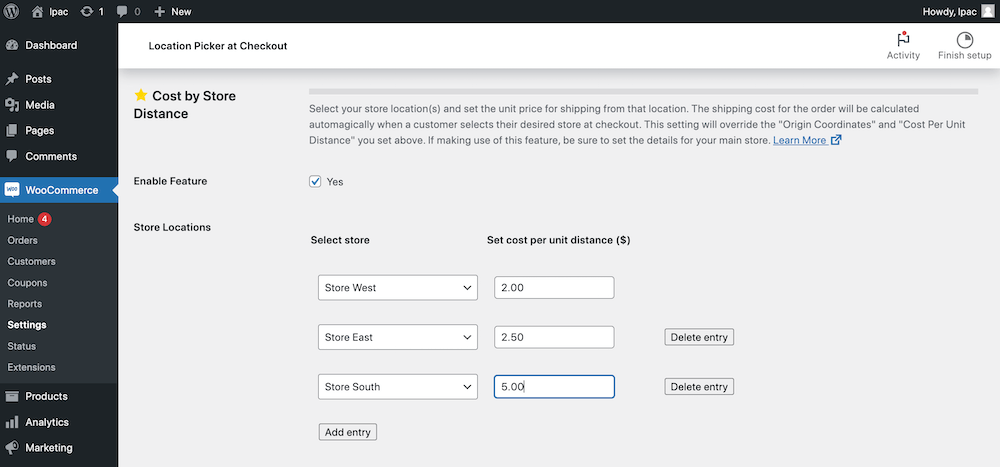
If you have multiple locations and allow customers to choose which store they receive an order from then consider using this option. Building on the distance based option, enabling shipping per store distance requires that you set distance prices then Location Picker at Checkout will use the customer’s approximate distance from the specific store they choose at checkout to set a shipping price for their order. This both incentivizes customers to choose the locations closest to them, and makes sure your business doesn’t lose out if someone chooses a far-away location.
Store Location
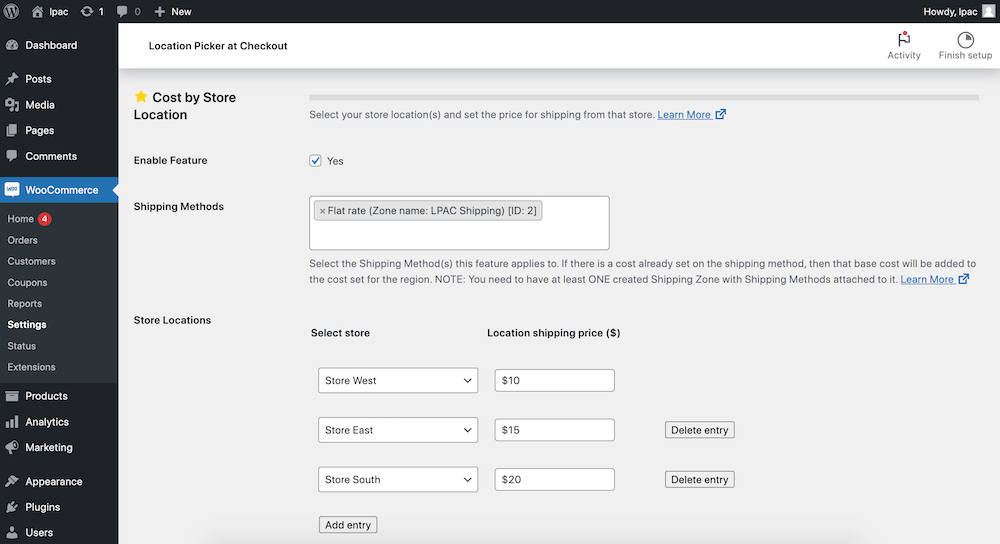
And finally (for now), with store location shipping you can set flat rates according to the store. This makes a lot of sense if your business already utilizes a flat rate shipping method through a mail/delivery provider. So if you have locations around the globe you can assign various flat rates according to what FedEx, DHL or other services charge you. This is both an efficient and cost effective option.
Advanced Location Based Reporting
The last major feature of LPAC we’d like to touch on is its value as a reporting tool. We mentioned before that store owners can use maps to see where orders are coming from, and this is a powerful marketing tool. And under WooCommerce Settings > LPAC > Export you can view a map for all your orders.
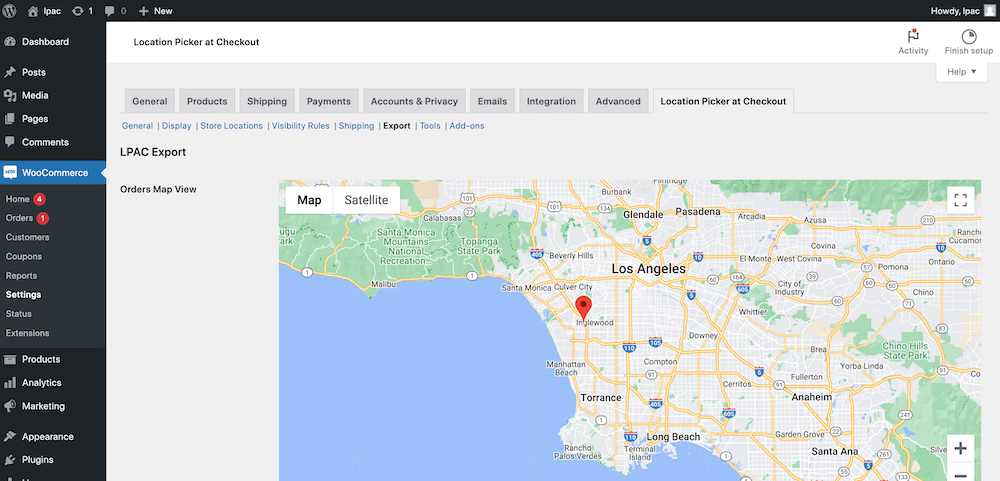
LPAC’s order locations export can be used to view current and past orders (or you can also export this information to a csv file). This data can then be used to plan inventory, marketing campaigns, future expansions, store improvements and more.
LPAC Free vs Pro
We’ve covered what makes LPAC a great WooCommerce add-on, but it just so happens to come in two flavors. You can grab the LPAC Free version on WordPress.org (which can be installed in seconds from your WordPress dashboard) or you can choose to purchase LPAC Pro, which is only available on their site (plans start at $39.99 per year for a single site license).
So why upgrade? The short answer is to get access to all of the powerful features we mentioned above, since we focused on LPAC Pro when creating this guide. But that doesn’t mean that the free version is limited. So let’s take a look at both and why you might choose one over the other.
LPAC Free
Location Picker at Checkout free is available on WordPress.org, which means you can easily install it from your WordPress dashboard. Keep in mind that you’ll need to have WooCommerce active before using this plugin, but once installed you’ll have access to the following features:
Detect customer location
Autofill address fields
Store location selection
Show or hide map based on shipping method, class or coupon code
Hide maps for guests
Display map or map link in order emails
Past order locations for customers
Customizable map container
Translation of map based on site language set in WordPress
LPAC Pro
To upgrade to LPAC Pro you’ll need to purchase an annual or lifetime plan, available only on their website. While the free version offers great options, the Pro version builds on those features even more.
Custom Google maps & marker icons
Customer saved addresses
Shipping cost by region & distance
Export order locations
More visibility rules
Restrict places autocomplete to a country
Support & updates (according to yearly or annual plan selection)
And there are premium add-ons on the way, with the first being a delivery and pickup scheduling add-on. So there’s even more to come!
To wrap thing up, we feel LPAC is an excellent add-on plugin for WooCommerce shops. If you sell physical goods via your website, operate brick and mortar locations or offer delivery options, you could even say this plugin is a must have. There are clear benefits to integrating checkout maps related usability and your store’s overall revenue.
But no need to just take our word for you – you can install the free version right now, or try the LPAC live demo to take the Pro plugin for a spin. We were impressed by the opportunities this plugin provides, and we’d love to hear your thoughts in the comments section below.
[ad_2]
Source link